How To Create Your Own WooCommerce Affiliate Program (SliceWP Review)
Are You Running An Online Store With WooCommerce?
Maybe you’re looking for a way to increase sales, but don’t have the budget to advertise? If that sounds like you, I think you need to read on.
One of the biggest problems for WooCommerce store owners is attracting new customers, whether it’s physical goods or digital.
In this review (yes, it’s a review/tutorial), I’m going to take you through a series of steps to help you promote your store, without spending any money on advertising. Sound good?
Cool, go put the kettle on, pour yourself a coffee/tea (I’ll have two sugars please), now sit back relax and find out how you can sell more products without the cost of ads.
So How Do You Sell More Products?
To give you an answer on how to sell more products using WooCommerce we’re going to need the help of a plugin. Now before you groan, hear me out.
In this tutorial/review, I’m going to use a relatively new plugin called SliceWP. What is SliceWP? Well, it’s a plugin to help you set up a WooCommerce affiliate program.
SliceWP An Affiliate Program Plugin For WordPress
A new player in the land of affiliate plugins for WordPress, SliceWP is available on WordPress.org for free.
Yup, free.
SliceWP aims to ease the process of creating an affiliate program by setting up affiliate pages for you, sending notifications, and of course, setting up commissions and payments for affiliates.
Keeping It Short (Sort Of)
To offer a more concise review and not make you read war and peace, I’ve split this hybrid post into more posts for you as well. There are a few things I’ve learned using SliceWP, and it’s here you find tips on how to use it and more. Don’t worry; you’ll know when you see a link.
Got your coffee/tea ready? Great, let’s crack on, don’t worry, I wasn’t thirsty, you selfish bleeder.
What You’ll Learn With This Guide/Review
Everything I’ll show you in this guide/review is free to do; the only cost to you is your time, which I know as a WooCommerce store owner is precious.
Here’s what you’ll learn:
- How to install SliceWP
- How to set up your very own affiliate program for WooCommerce
- How to add affiliates manually (if you’re not quite ready to launch)
- How to use creatives to sell more (+ a hidden feature!)
- How to pay affiliates
- Benefits/drawbacks of running your own affiliate program
- Whether SliceWP is worth it
Preparing
In preparation for this guide, I’ve got WooCommerce installed already with some fake products.

Got to love that new WooCommerce installation wizard, right? Hmm.
Installing SliceWP
All you have to do is search for SliceWP in your admin backend.
Hit Install then Activate, once you’ve done this, you’ll see the SliceWP set up wizard. Obviously, for this tutorial, I’m going to select WooCommerce as the integration for the affiliate program.

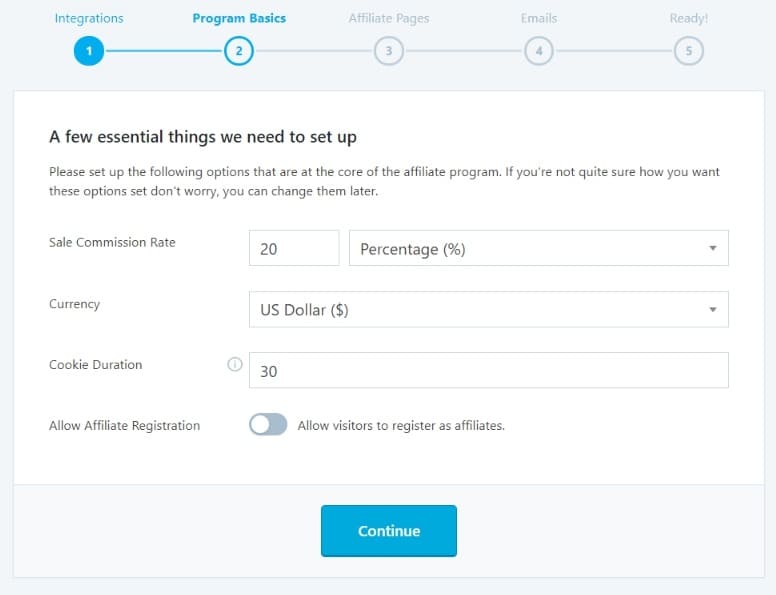
Affiliate Program Basics
The next step deals with the sale commission rate, commission type, a percentage discount or fixed amount, the currency, cookie duration, and whether you’d like to allow affiliate registration.
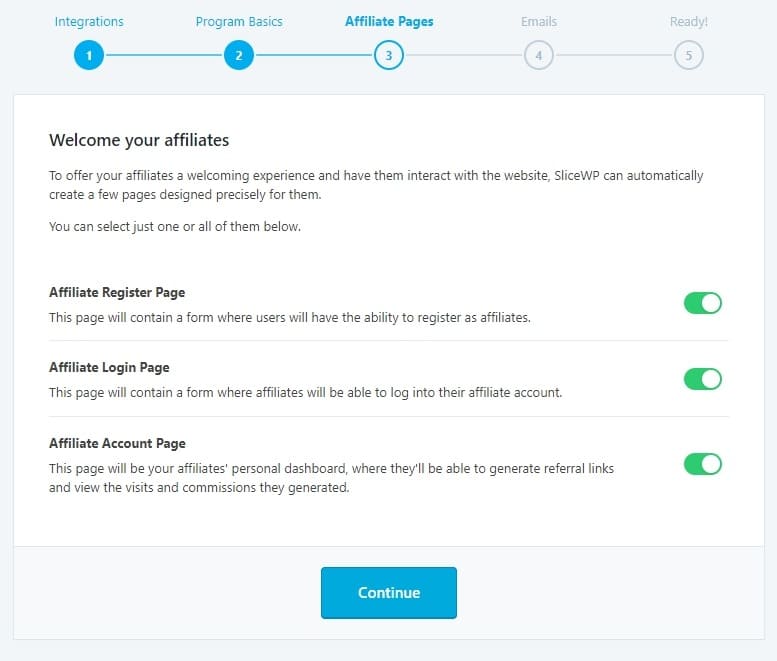
Affiliate Pages Setup
Three options here, the plugin lets you set up pages for registration of affiliates, a login page, and an affiliate account page. A simple toggle to enable or disable.
Affiliate Email Notifications
This step deals with the notification emails sent for SliceWP for:
- Admin – New Affiliate Registration
- Admin – Commission Registered
- Affiliate – Account Registration
- Affiliate – Commission Approved

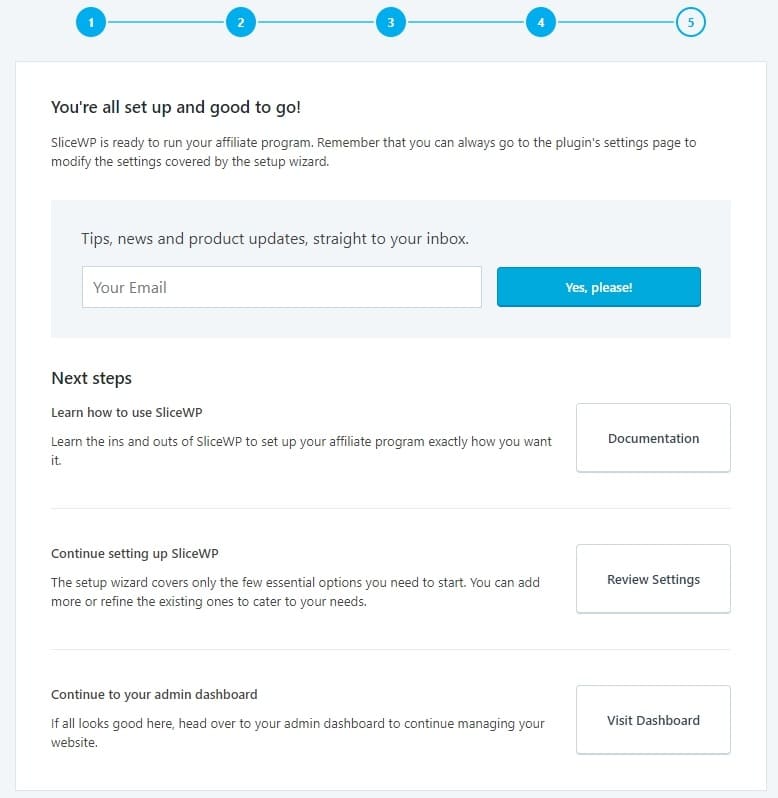
Ready To Go
The final step lets you know you’ve completed the setup, and here you can sign up for news and updates about SliceWP, view documentation, review settings, or continue to your admin dashboard.
Thoughts So Far
So far, so good, very easy to get up and running, and in truth, it was a matter of minutes to set up SliceWP. So a plus on that one, I do love an easy to use setup wizard.
SliceWP Settings
The setup wizard is the first step to SliceWP, let’s take a look at the settings page for more granular controls. See what this bad boy can do.
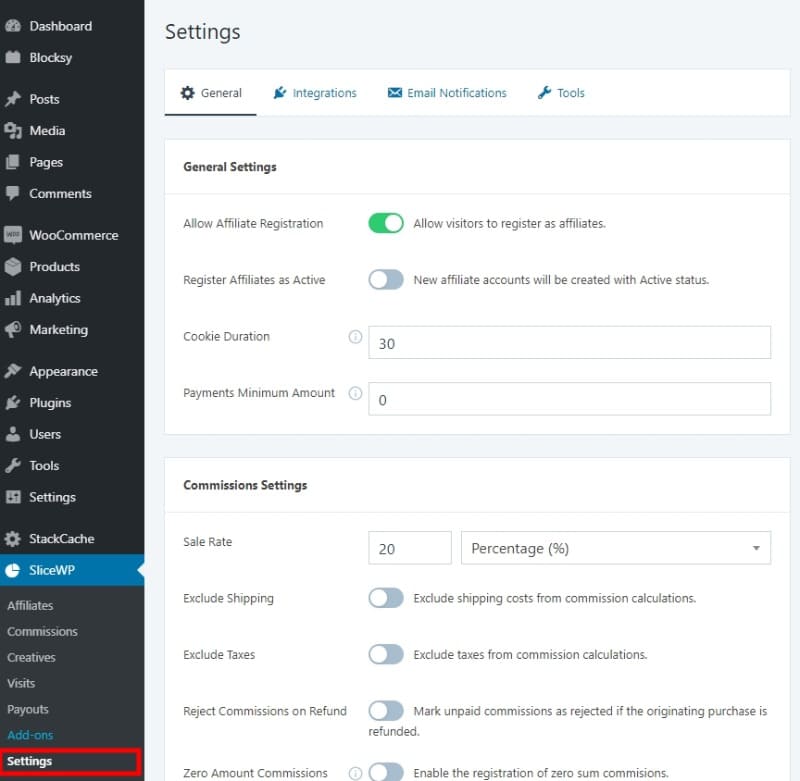
With four tabs across the top, let’s take a look at each one individually, the UI (user interface) for SliceWP is laid out nicely for the record, and it’s intuitive so far.
General Settings
The General tab in SliceWP is broken into five sections, first up, General Settings.
Here you can enable/disable affiliate registration, set the status of affiliates, automatically make them active by default, set the cookie duration, and the minimum payment threshold for awarding commissions to affiliates.
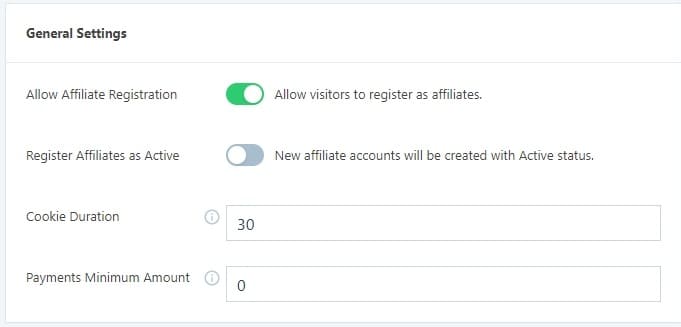
The cookie duration feature is excellent, changing this to a higher amount could make your affiliate program more alluring to potential affiliates. By default, it’s set at 30 days; nothing stops you from changing that to 60 days or 90 days.
Increasing the cookie duration could make all the difference for your affiliate program. Find out more about this with my guide on creating the perfect affiliate program using SliceWP.
Commission Settings In SliceWP
Using these settings, you can set up the payouts for commissions for approved affiliates.
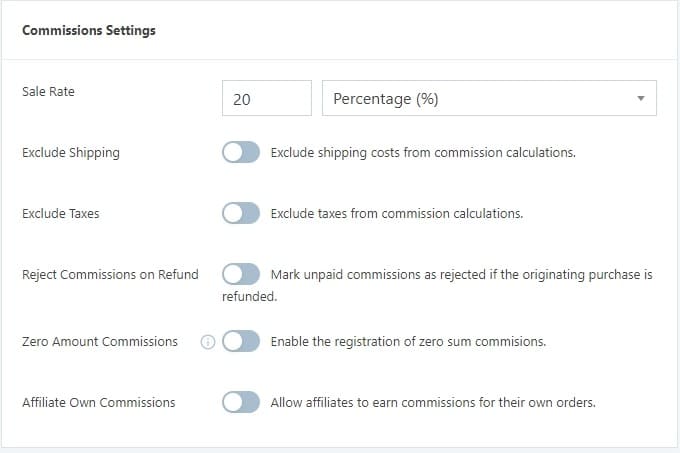
- Sales Rate – Percentage discount or a fixed amount
- Exclude Shipping
- Exclude Taxes
- Reject Commissions on Refund
- Zero Amount Commissions
- Affiliate Own Commissions
Affiliate URL Settings
Affiliate URLs, SliceWP needs to identify the URL used by a visitor to your website as tracking. Here you can set keyword which is used in an affiliate link.
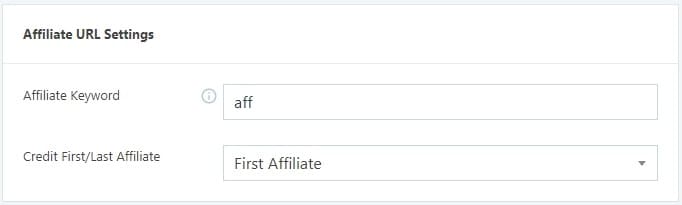
By way of default, the URL is set to aff, so for example:
www.isellstuff.io/?aff=1
Where 1 = the ID of the affiliate, who refers a sale to the site. You can change this to whatever you need, keep it short, and don’t use capital letters.
Credit First/Last Affiliate, choose whether to award the commission on the first visit to your site from the affiliate or the last referral visit.
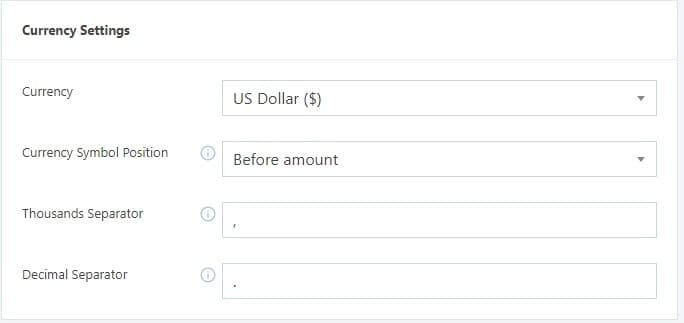
Currency Settings For SliceWP
I’m not going to spend too much time here; it’s relatively straightforward. You can change the currency, the position of the symbol, and the separator for thousands and decimal separators.
Pages Settings
Another straightforward settings section, here you can choose the affiliate account page, select a terms and conditions page and add a label (displayed on the affiliate account registration page as a checkbox).
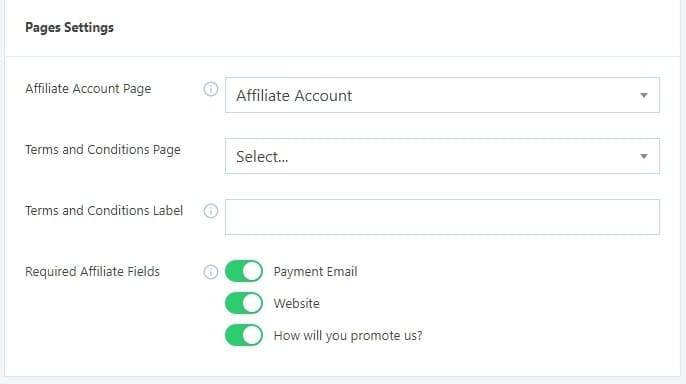
The required affiliates fields toggles deal with what the affiliate is required to fill in, to register as an affiliate. From the toggles enable or disable:
- Payment Email
- Website
- How will you promote us
My advice? Keep them all active.
reCAPTCHA Settings
Nobody likes spam, SliceWP uses reCAPTCHA to deter spammy affiliate registrations on your site, which is another excellent feature. If you’d like to find out more about reCAPTCHA, take a look here.

Integrations Tab
I’m skipping this as it’s a list of integrations via toggles, due to the fact I’ve chosen WooCommerce from the installation wizard.
Email Notifications In SliceWP
There are two sections to the Email Notifications section, the first deals with General Settings.
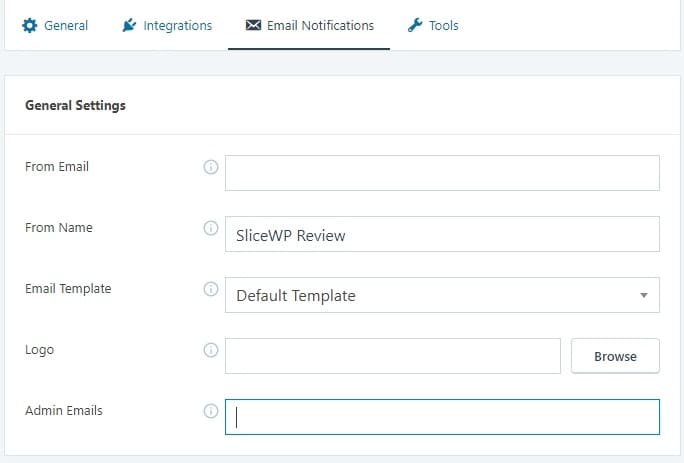
- From Email – Deals with the email address notifications will be sent from
- From Name – The name that shows up in an email client
- Email Template – Either Default Template or Plain Text
- Logo – Upload your logo to be used in the Default Template, not applicable for Plain Text
- Admin Emails – If you have a different email address you’d prefer to get admin notifications from, enter it here.
I’d recommend a different email address for Admin Emails, and if you use the same email for the From Email and Admin Email, it could get confusing, best to separate them, makes it easier for you. Especially if an affiliate replies to your email notifications!
Configuring Email Notifications
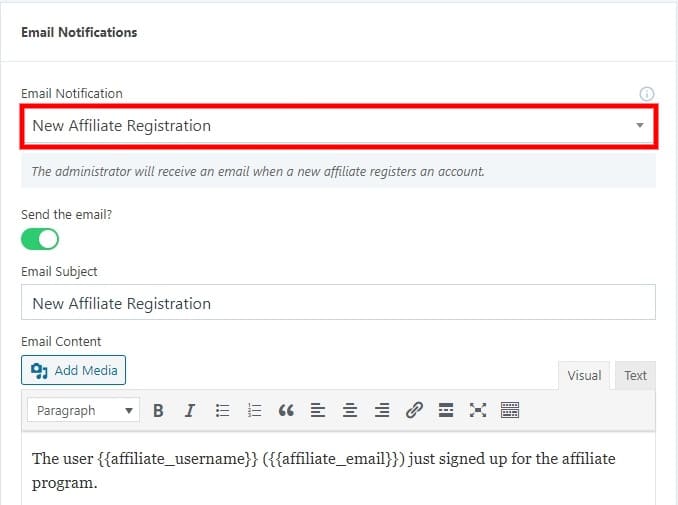
Admin emails (the ones you receive)
- New Affiliate Registration
- Commission Registered (a sale)
Affiliate emails (the ones they receive)
- Account Registration
- Account Approved
- Account Rejected
- Commission Approved
Take Affiliate Account Registration for example, here you can change the Email Subject bar, and use the classic editor to add content welcoming them to your affiliate program.
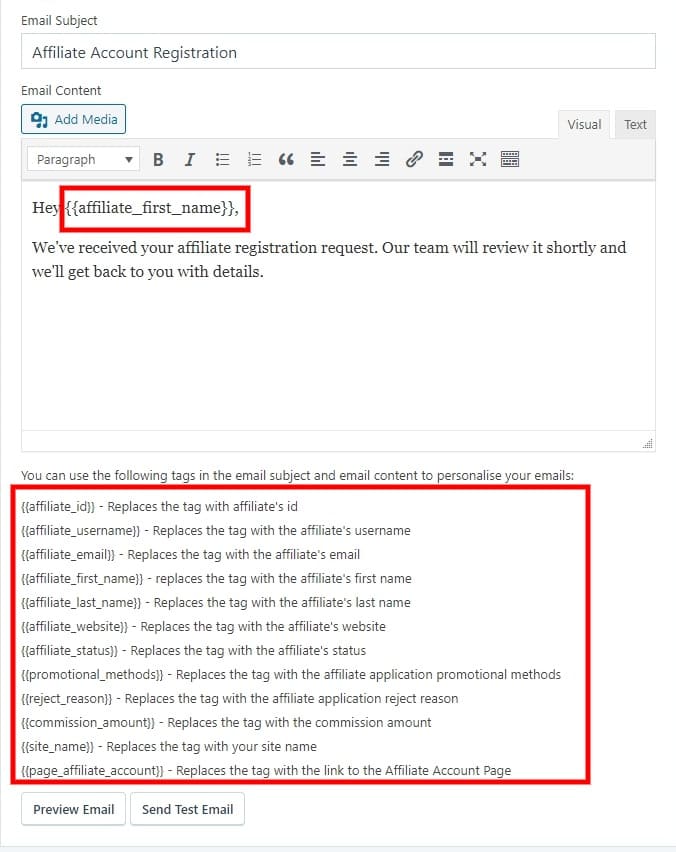
You’ll notice from the above screenshot, that SliceWP makes use of template tags. The idea of these is to make things a lot easier when sending notification emails to Affiliates.
Tags can be used in the Email Subject bar as well as the classic editor. For example, let’s say that the affiliate who signed up is called Mike:
Hey {{affiliate_first_name}}, Thanks For Registering, Here’s What’s Next
Would translate to:
Hey Mike, Thanks For Registering, Here’s What’s Next
Using the tag method, you can create some pretty excellent email notifications. I’m not going to cover these here.
Mainly due to the fact I have some cool things you can do and top tips for emails using SliceWP, it’s a post in itself, take a look.
While I’m on the topic of email notifications, there’s another excellent feature that SliceWP offers, sending a test email.
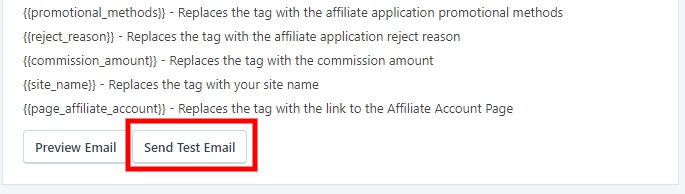
If you want to know how to send killer emails with SliceWP, check out the post.
Tools In SliceWP
No screenshot required here, this final section in the settings section, deals with:
There’s quite a lot to go through, and I’m trying to keep this guide/review as lean as I can without missing anything out.
More Settings In SliceWP
Before I can show you the affiliate pages and what it all looks like, it makes sense to stay with the internal settings, these will lend themselves to the external output. Otherwise, it’s a lot of back and forth.
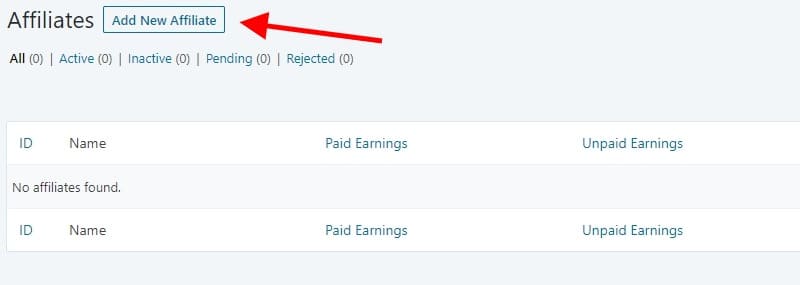
Adding An Affiliate In SliceWP Manually
If you’ve decided not to allow affiliate registrations on the front end of your WooCommerce store, you might like to add them via the backend in SliceWPs settings, and it’s here you can do just that.
It could be a case of you wanting to trial your affiliate scheme first before you go all out, by allowing affiliate registrations and such.
Thankfully SliceWP allows the manual addition of affiliates to help you get started. See below for the adding an affiliate screenshot:
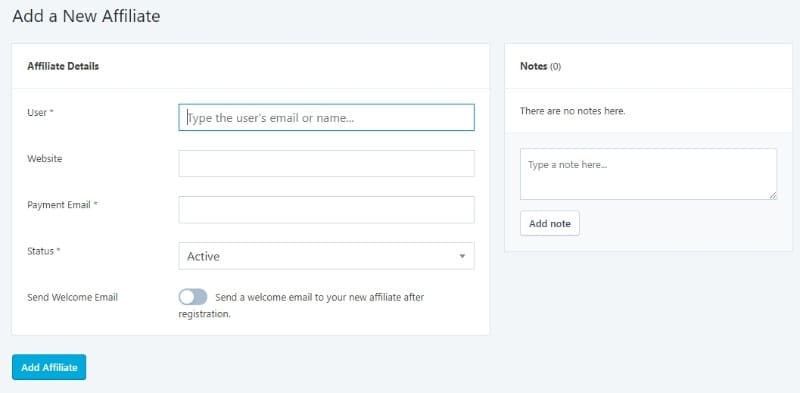
Now, it’s worth noting the following, the first field deals with User. Here type in the users’ email or name to find them. You will need to realize that by doing this, it will search through existing customers/users listed on your WooCommerce store.
- You cannot manually add someone who is not already a member of your site. They need to have registered on your website for you to select them.
What if you wanted to add a friend or colleague manually and they’re not already a customer or user? See below.
Creating A New User For Your Affiliate Program
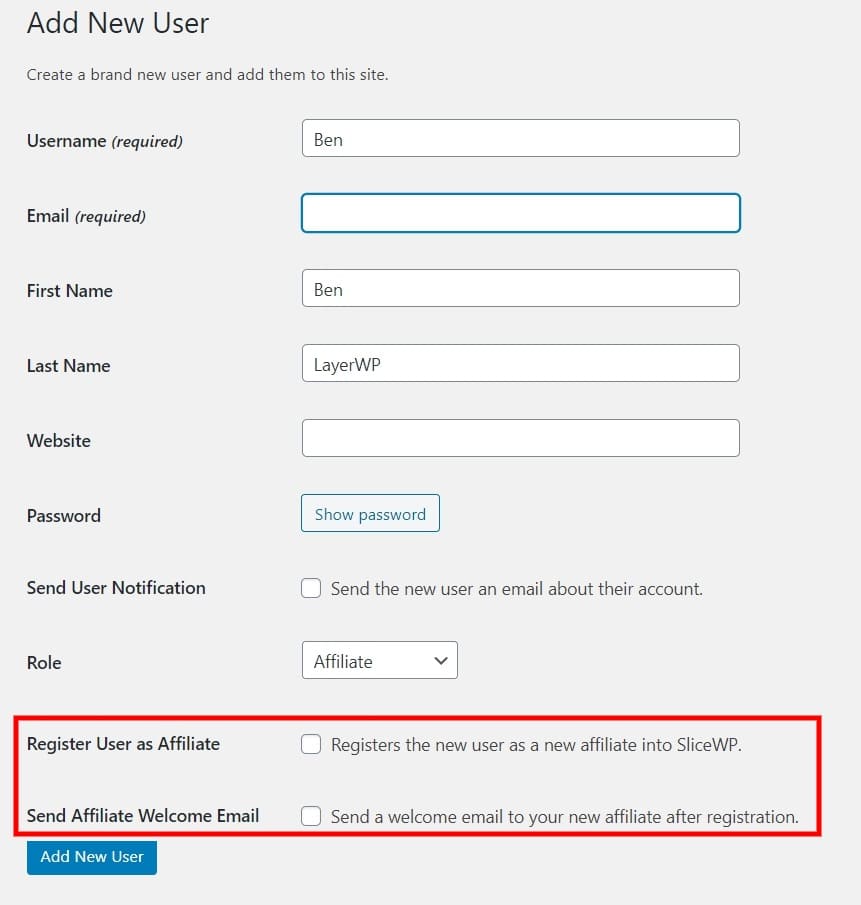
You’ll note the two additions to the add new user page, underneath the role, you can see Register User as Affiliate and Send Affiliate Welcome Email.
Check the box for register user as an affiliate and totally up to you whether or not to send the welcome email.
The above is not needed if you decide to use affiliate registration, to test the water, you might want to use this method first, helping you get used to running an affiliate program.
Notes In SliceWP
A useful feature here, well a couple one is the internal notes section, so you can add a remark about the affiliate like:
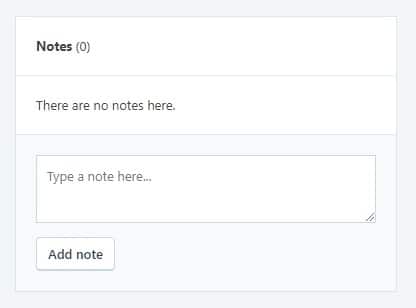
“Check up in a couple of months see how they are getting on.”
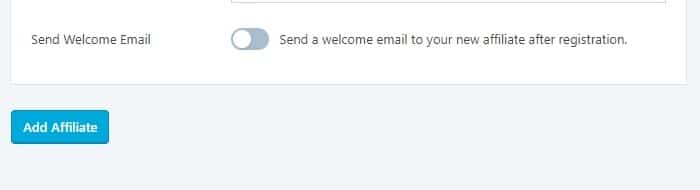
The other is the ability to send a welcome email or not. Handy if you’d like to test things out by adding a fake account to test it all out for yourself.
Affiliate Pages Created By SliceWP
I want to show you the affiliate pages SliceWP creates, to give you an idea of the output, first things first let’s take a look at the affiliate registration page.
Affiliate Registration Page
The first page I’m going to show you is the affiliate registration page, it’s where our affiliates will be able to register.
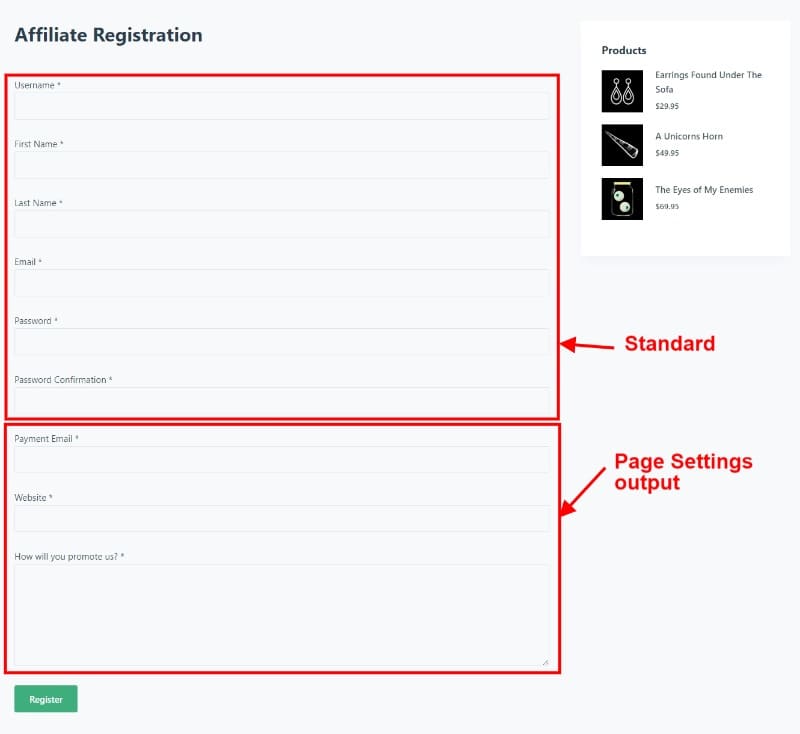
Using a shortcode, the affiliate page outputs your pre-defined criteria from the Pages Settings section mentioned earlier. See below for the shortcode:
[slicewp_affiliate_registration]Affiliate Login Page
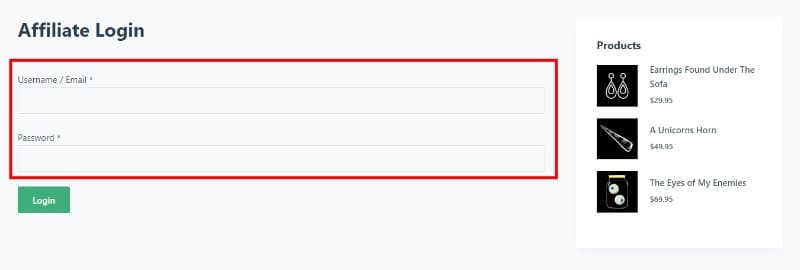
We need a login page for our affiliates. Well, on the same basis, it works on the following shortcode, albeit slightly different.
The following shortcode is used:
[slicewp_affiliate_login]This outputs the following page content, not the sidebar content just the main section:
Affiliate Account Page (In Brief)
Below is a screenshot of the Affiliate Account area, I’m going to cover this, just not yet.
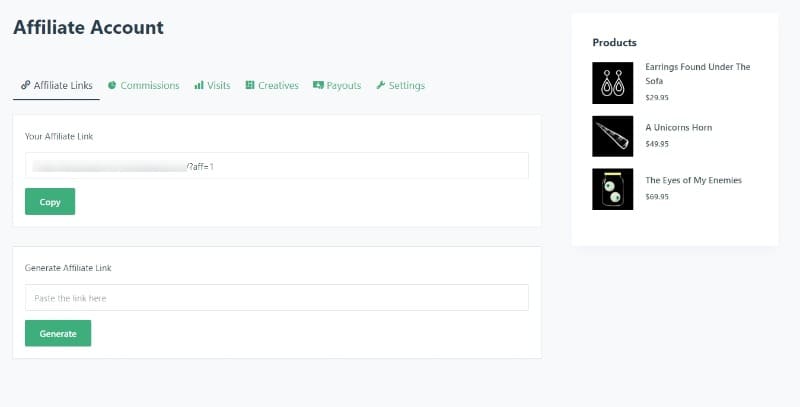
Shortcode time again, this time it’s:
[slicewp_affiliate_account]Why am I showing you this? Well, what if you didn’t want to set up affiliate URLs in the installation wizard?
Maybe you want the pages to be called something else; you can enter the shortcode to your pages and have something else entirely different in terms of the page name and URL structure.
Approving Affiliates Manually
If you’ve decided to allow affiliate registration for your WooCommerce affiliate program, I would recommend to set the process to requires approval.
SliceWP gives you a complete overview of the affiliate who’s recently registered. Take a look at the below screenshot to see what I mean.
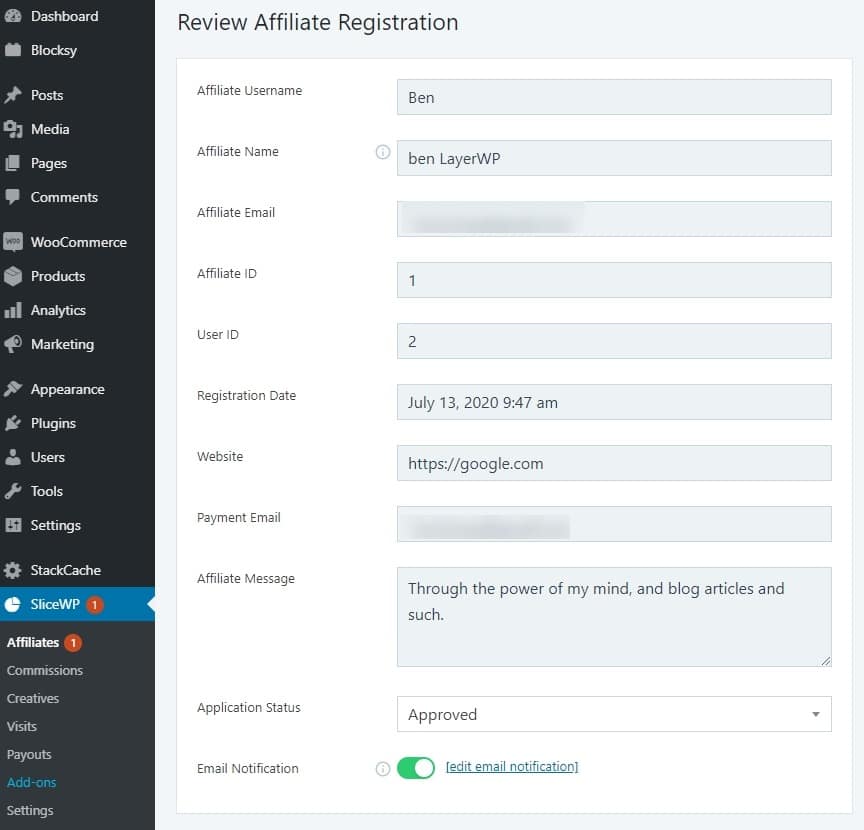
We have the Affiliate Name, Email, ID, User ID, Registration Date, Website, Payment Email, and Status.
This information helps you build a picture of this affiliate application. I have some tips for you on this, so please feel free to take a look at my guide.
Email Notifications From Affiliate/Admin Perspectives
As an affiliate, I’ve registered on my test site and received an email notification (the standard one) as below:
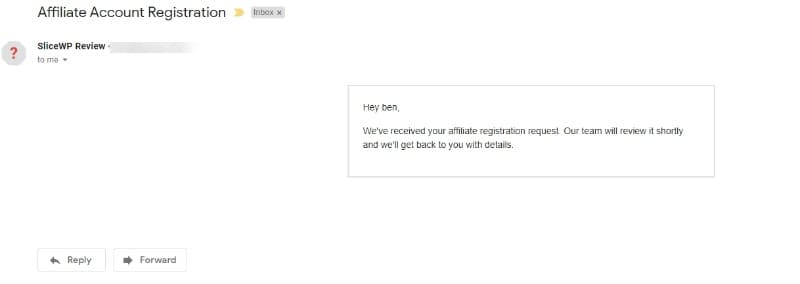
Again as an affiliate, I know that my registration is in hand; it’s essential for you as a WooCommerce store owner to see the process and how it works.
The email notification for Admin is as below:

Brilliant, as a store owner, I know that someone has taken the time to sign up as an affiliate. This will then lead you to manually approve them, find out more about their promotion methods, and, of course, their website. If you decide to approve them, the user will see the below:
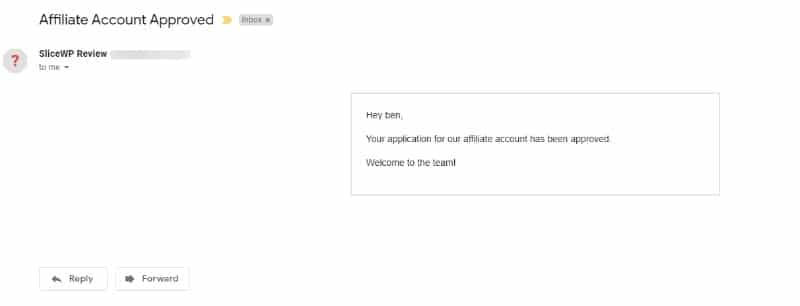
Now the user has received a notification stating they are approved. All very scant detail granted, no fault of the plugin, it’s down to you to make this appealing.
Again I have some tips on this, so feel free to check them out.
The Affiliate Dashboard More In-Depth
I promised I’d cover this in a little more detail from an affiliate perspective. So here goes.
I’ve gone ahead and made a few sales using my test account as an affiliate, I’ve set the payment method to Cash On Delivery, mainly due to the fact I don’t want to tinker around with payment gateways and make things easy for testing.
I want to show you the affiliate dashboard with a little more meat on the bone, as it currently stands, the dashboard is empty.
Affiliate Links In The Dashboard
The Affiliate Dashboard is broken up into six sections in a tab format; the first deals with affiliate links.

An affiliate can cut and paste a URL from a product on your site and generate an affiliate link to it, automatically appending the referral code needed for tracking. See below:
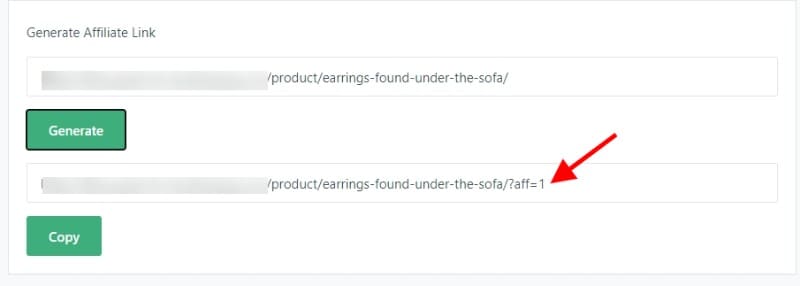
All the affiliate has to do is copy the link via the button, helpful and above all else simple.
Commissions Tab
See below screenshot with a couple of commissions I made as a registered affiliate:
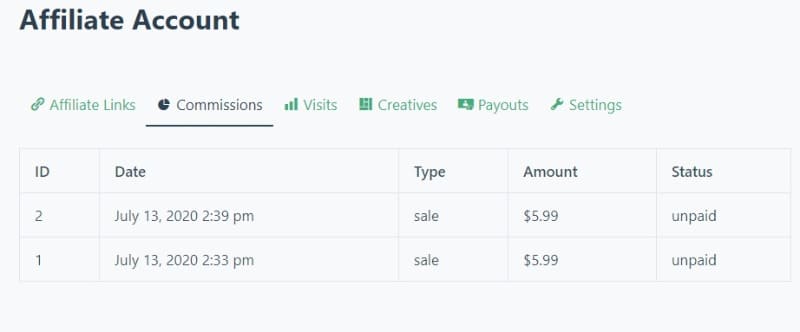
Clean and clear for the affiliate, they can see they’ve made a sale the type of sale, the amount they have made, and the status, currently set to unpaid.
As I have chosen Cash On Delivery, the affiliate will not receive an email that they have earned a commission, until the order is marked as completed. Once completed, they receive an email notification.
Store owners receive a notice immediately that an affiliate has made a referring sale.
Visits Tab
As with any review, I do like to come across an issue, it’s not me being an ass about things, but I did notice a problem with a sidebar activated on the Affiliate Account page.
Better to spot them now and point them out than lie about them.
See below for the issue I found:
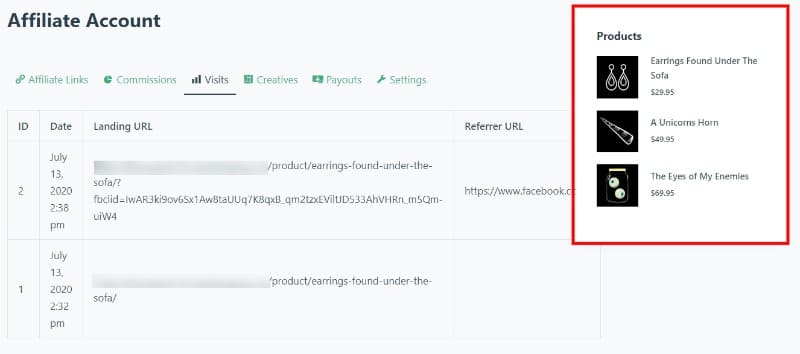
As you can see from the above, with a sidebar activated, the referring URL gets covered, now this could be a theme issue maybe (I’m using the Blocksy theme).
Or perhaps the plugin needs to truncate or minimize the characters’ output, so those with sidebars activated on the affiliate account page don’t get affected.
Thankfully the theme I’m using lets you choose a layout for pages, so I’ve disabled the sidebar on this page, see below:
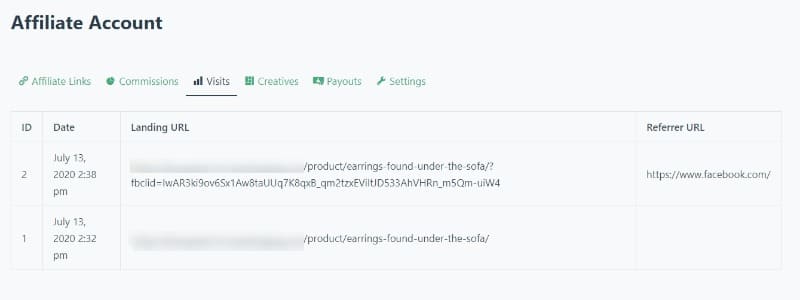
There, that’s better! We can see as an affiliate, where the sale comes from via the Referrer URL.
It’s useful for affiliates to know where the source of the commission comes from; in turn, this could help them focus on specific areas that work for them, to help them make more money, and as a by-product, help you earn more revenue as the store owner.
Creatives Tab
The creatives tab is where affiliates can view special offers, images for their websites, and more. Take a look below for an image of a text offer I created in the SliceWP settings for affiliates:
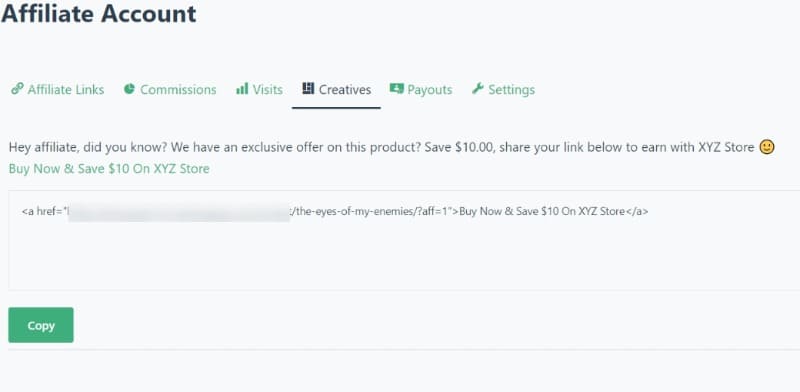
All an affiliate has to do is click copy and paste into whatever platform they are using. SliceWP automatically adds the corresponding affiliate ID, depending on the user.
The Creatives tab is a great way to highlight special offers, banners, and more, allowing the affiliate to choose an offer they’d like to promote and earn from.
There’s something special about the creatives tab from an admin point of view; later, I’ll show you something pretty cool. Are you ok to hang on?
Payouts Tab
The payouts tab, here affiliates, can view how many payouts were made and the amount they were paid, the status, and lastly, action.
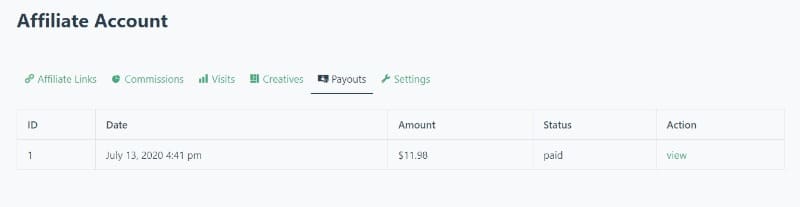
Found another minor issue, the Action View link. Clicking on this link takes you to the very first tab, the Affiliate Links one. I’m not sure why this is happening, but it is an issue, and I’m letting you know about it!
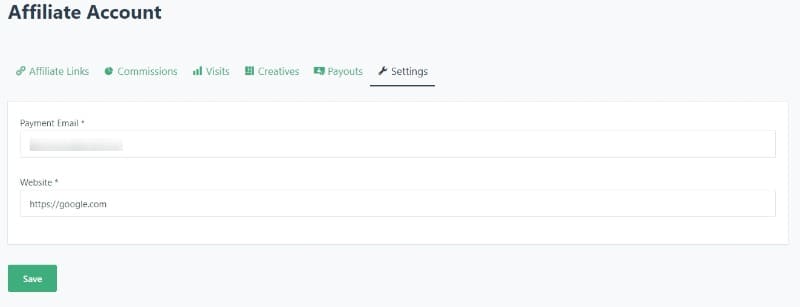
Settings Tab
Here an affiliate can update there payment email address and change their website if they need to. Useful if a member moves to another site or wants to change their email to a new one.
Managing Affiliates In SliceWP
Now you know what your WooCommerce affiliate program will look like to an affiliate, let’s look at some more settings as a store owner.
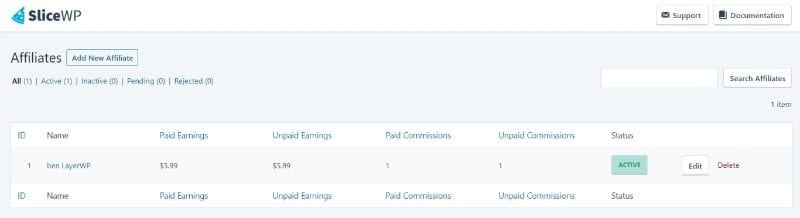
Here you will find a list of all the affiliates you have for your WooCommerce store. You can see a brief overview of the member’s name, paid earnings, unpaid earnings, paid commissions, unpaid commissions, current status, and edit or delete.
If you decide you need to edit an affiliate members details, hit edit and you’ll see the below:
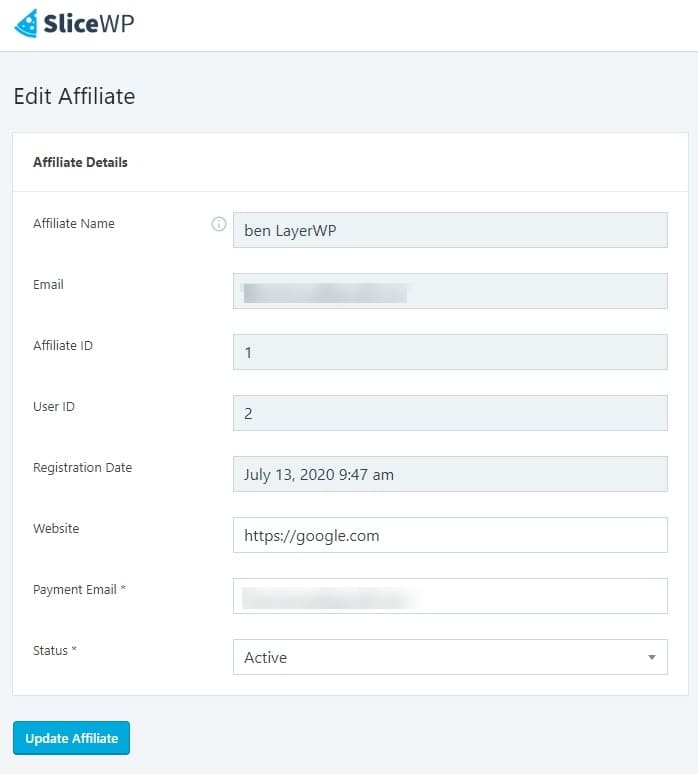
You can reject the affiliate (if they’ve violated your terms), mark them as inactive, pending, or approve them. If you need to delete the affiliate for whatever reason, you’ll need to do that from the Affiliates overview section.
- *Personally, I would have liked to see a delete button as well as the Update Affiliate one, but that’s just me.
Commissions & Adding A New Commission

Now we have some affiliate sales to play with, let’s take a look at editing an actual affiliate commission. Clicking on edit you’ll see the below:
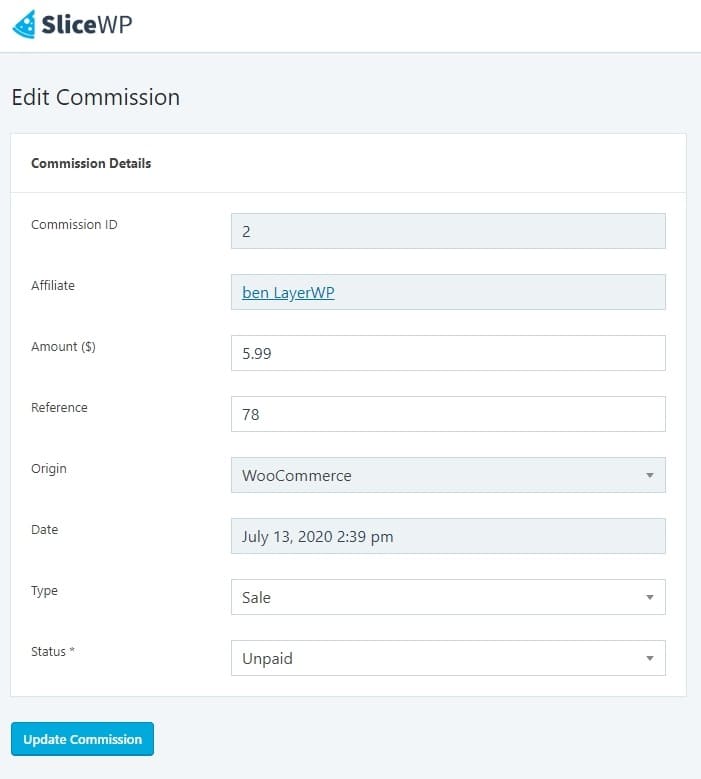
This is where the commission details live; we have the ID, affiliate name, the amount made, reference number, the origin of the commission (WooCommerce in my case), the date, and the type of sale.
I’ve purposefully changed the status on this one to unpaid, and you can choose from paid, unpaid, pending, or rejected.
By making it unpaid, the affiliate will see in their dashboard that this particular commission is marked as unpaid.
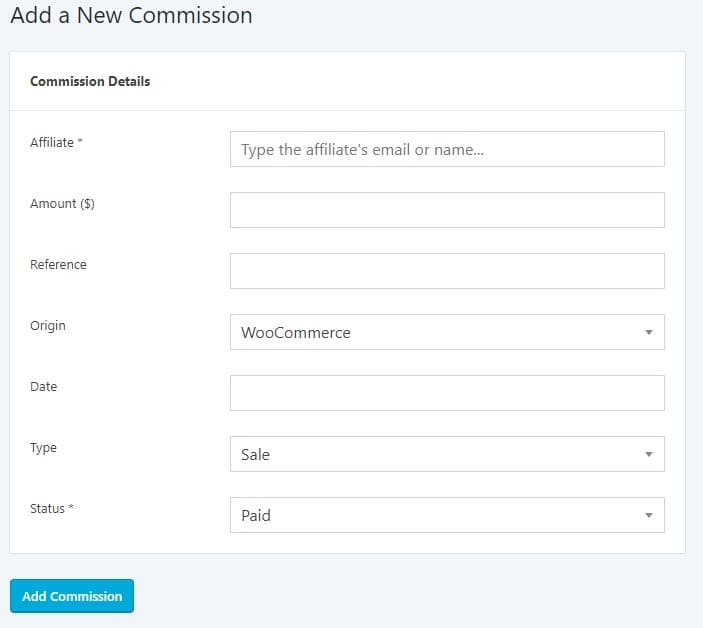
Adding A Commission Manually In SliceWP
You can add commissions manually in SliceWP, here you can search for the affiliates name/email, add an amount, add a reference for your use.
The point of origin refers to the system in place; in my case, WooCommerce, set a date and mark whether it’s a sale or a subscription; lastly the status of the commission, Paid, Unpaid, Pending, or Rejected.
Manually adding users and commissions is a great way to test the water in creating an affiliate program for your WooCommerce store.
- Add a fake user, attribute a dummy commission, sign in as the phony user, and see how it flows from a user perspective.
Adding Creatives In SliceWP
What do you mean to add a creative? Well, SliceWP has a great feature called Creatives. Here you can create and add banners (eye-catching images) for affiliates to use.
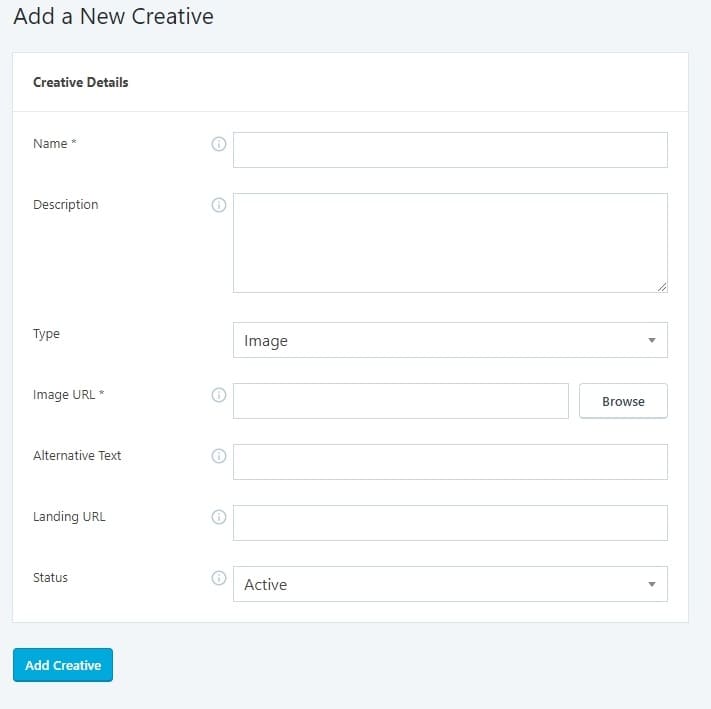
You can give your creative a name, a description, and choose whether it’s an image, text, or long text.
If it’s an image upload one, give it some alternative text, set the desired landing URL, and choose the status either inactive or active.
I’ve gone ahead and created a couple, see below for an image creative:
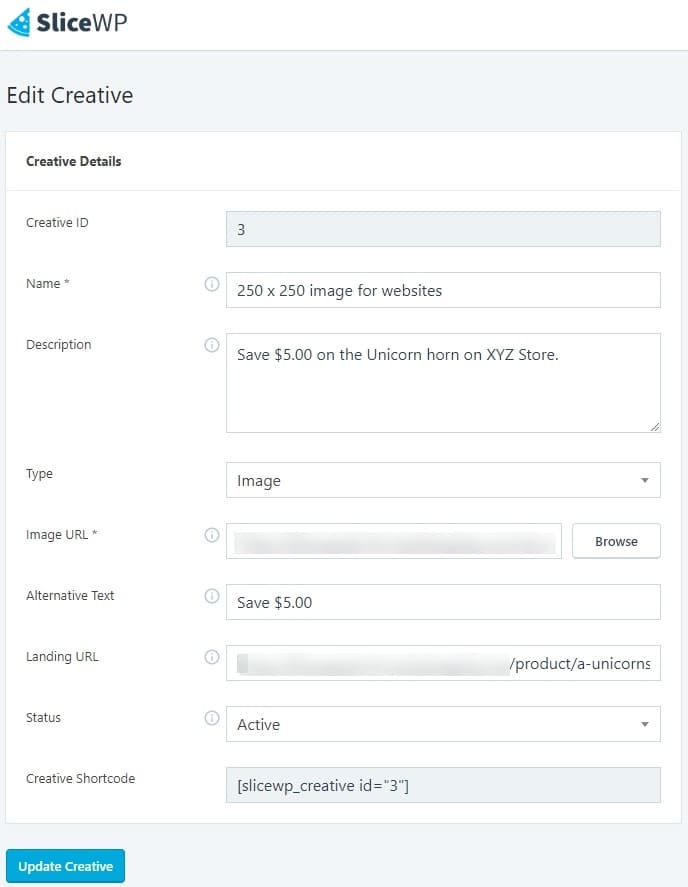
As you can see, I’ve given the Creative a name, and this is shown on the affiliate dashboard under creatives. I’ve given it a description, chosen the type as image, uploaded an image, and given the image some alternate text.
The alternate text could be better! I’ve chosen a product in particular for this creative campaign and the status set as active. See below for what it looks like in the affiliates dashboard:
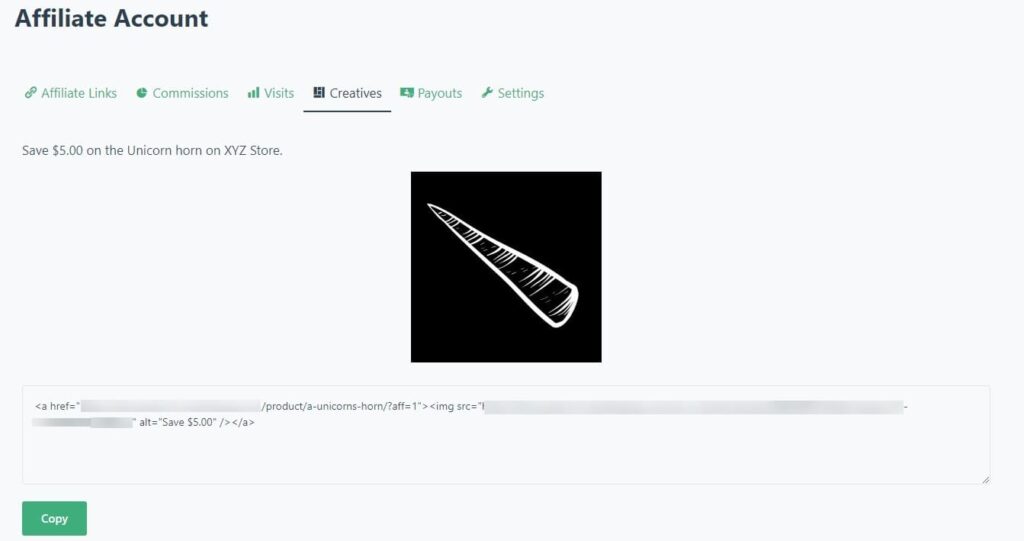
Looks good, right? Clean and clear, perfect for affiliates to use, all they have to do is click to copy the HTML and paste into a section on their website.
Using this method, you can create a wealth of image sizes for specific products for your affiliates to use.
Creative Shortcode WTF Man!?!
Now those with a keener eye may have noticed from the previous screenshot the below section:
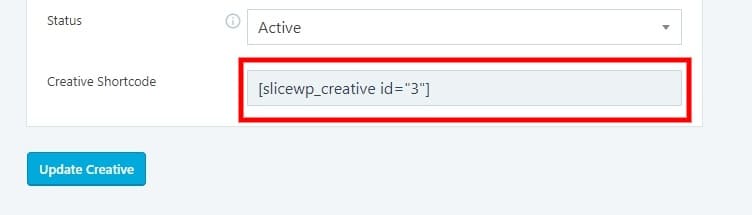
This is where things get awesome. I couldn’t find out how to use this shortcode in their documentation; I discovered it through testing SliceWP.
Each creative made gives you a shortcode, as you can see from the screenshot. I pasted this into a standard blog post, and it didn’t work.
I tried again and again to no avail. Then it clicked. I cut and paste the shortcode into the short product description. As below:
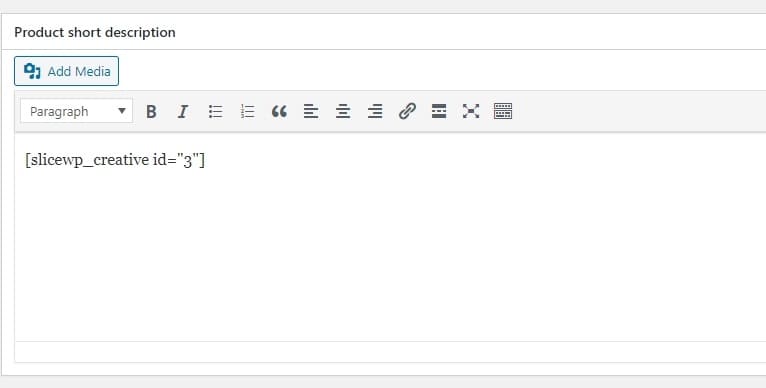
I then viewed the product I’d made this change on. Guess what? (See below).
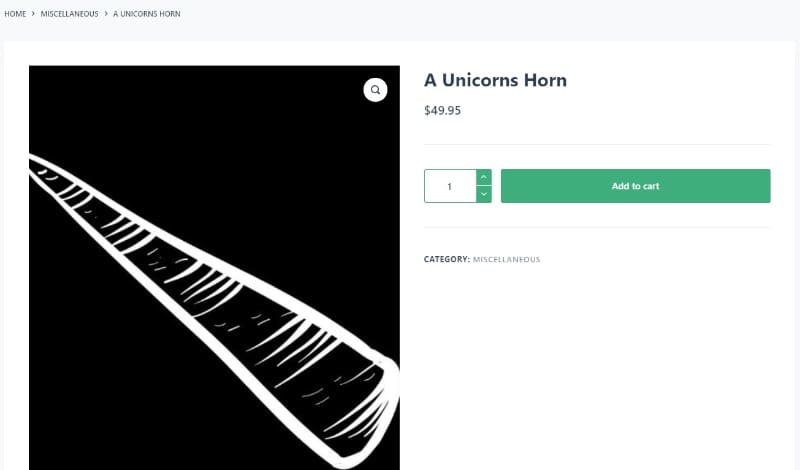
Still nothing, it was mildly infuriating. It was then the penny dropped. I’d been looking at this from the wrong viewpoint. Or, in my case, the wrong user role.
With that in mind, I logged in as an affiliate and viewed the product again. Low and behold!
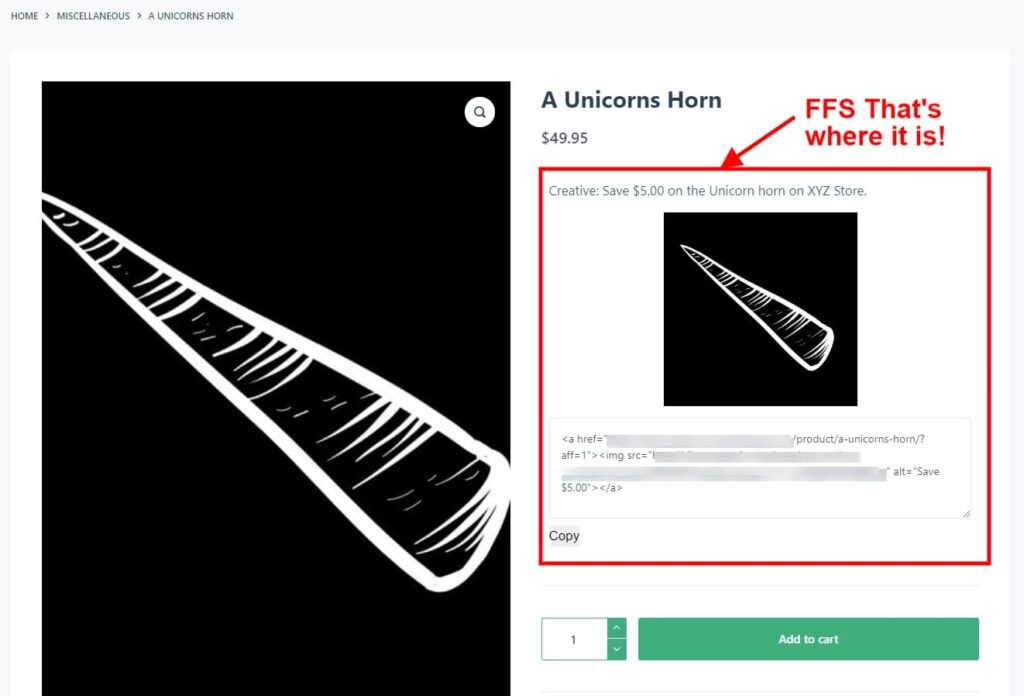
Why in the brightest of blue F&*ks was this not in the documentation! This feature is fantastic!
Display shortcodes for affiliates anywhere on your site (or in this case in the product description) and attract more attention to offers.
Only affiliates can see it, not customers, (not even administrators lol) just members of your affiliate program, I mean come on SliceWP folks, this needs to be highlighted!
Not every affiliate member will view the creatives tab in their affiliate dashboard, displaying it in a product could make all the difference!
Shame on you, SliceWP, for not making more people aware of this amazing feature!
Visits In SliceWP
Right, spleen vented, and now you know about the creatives shortcode (which is an impressive feature BTW) next up is Visits.
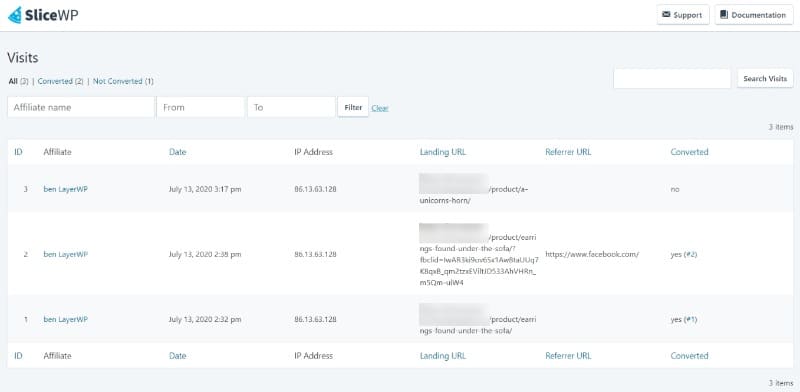
There is nothing to edit here, and it is merely an overview of how many visits your affiliates have generated. It’s useful granted, here you can see the affiliate name, date of visit, landing URL, referrer URL, and whether or not it converted into a sale.
Payouts In SliceWP
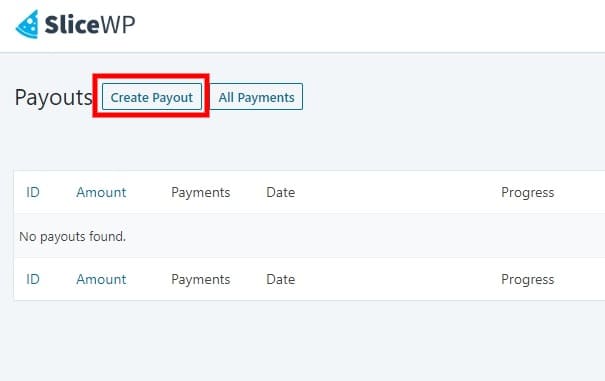
Creating payout information is a manual process in SliceWP. Clicking on Create Payout, you’ll need to define some criteria.
In this case, I’m going to choose the beginning of July till today the 14th. I’m going to leave the affiliate name blank to view all commissions irrespective of a specific user.
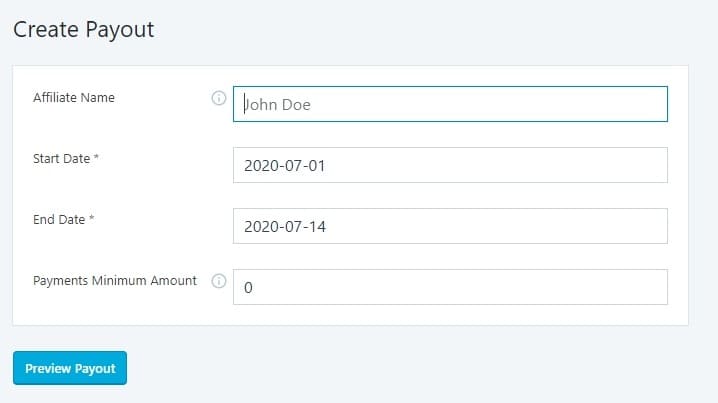
You will also note that I’ve left the option: “payments minimum amount” to zero. Doing this will return all the commissions irrespective of the value.
For example, let’s say you wanted to generate commissions for all those who have made over $50 for that specific time frame. Then you’d add 50.00 in the “payments minimum amount” section.
Previews Of Payouts
So my criteria is set, see below for what happens.
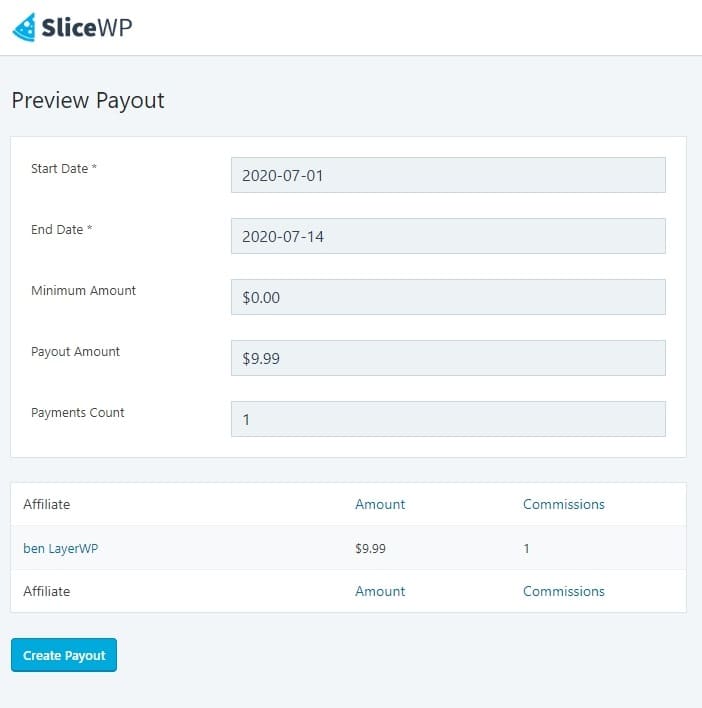
I’ve deleted some commissions and made one new affiliate sale using my dummy account. I want to keep things clear for you. So just the one transaction to deal with, if you had a load of affiliates, then obviously this list would be quite long.
Create A Payout In SliceWP
Clicking on the create a payout button, will as it clearly states, create a payout. See below screenshot:
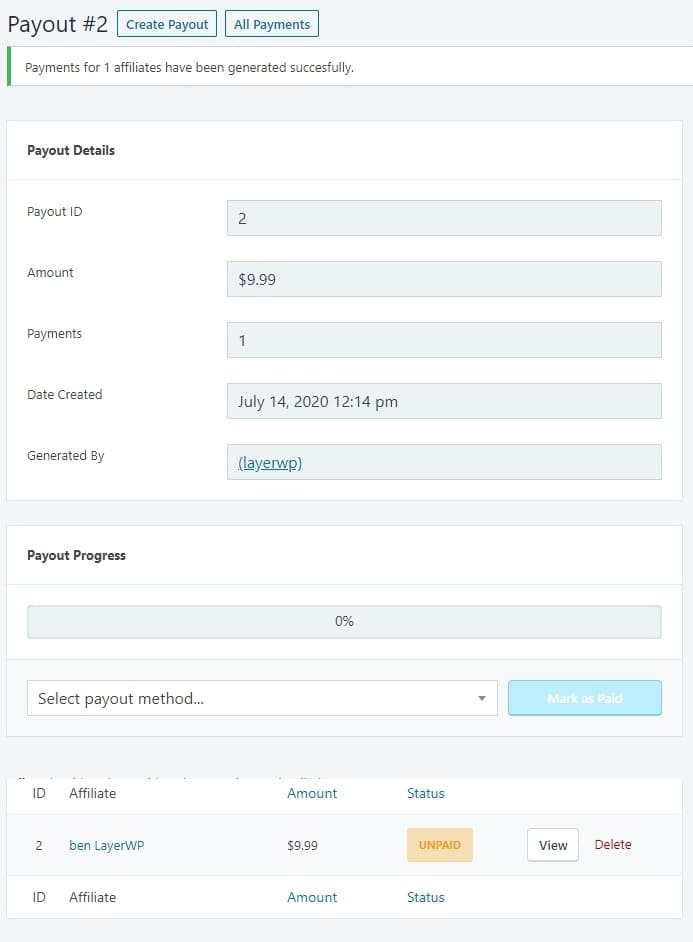
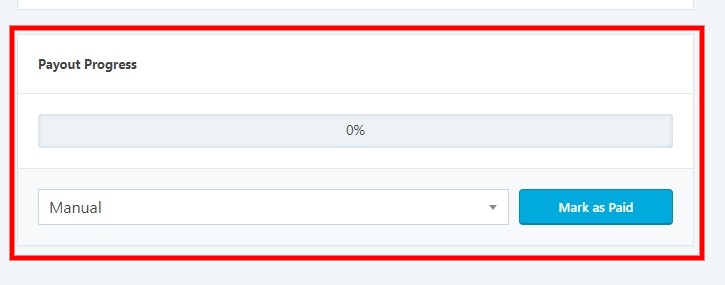
As we’re paying our affiliates manually, you’ll need to change the payout to manual and mark as paid:
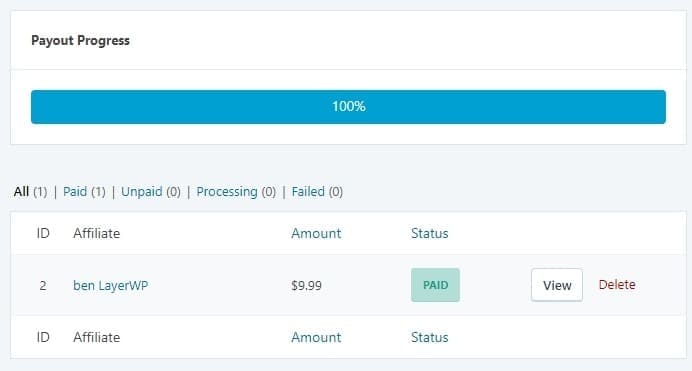
Once done, all affiliate payments are marked as paid as below:
What if you have lots of affiliates? Manually sorting them from this section, going into every single member getting there email address and on and on, would be an absolute nightmare.
Multiple Affiliates, No Problem
Thankfully
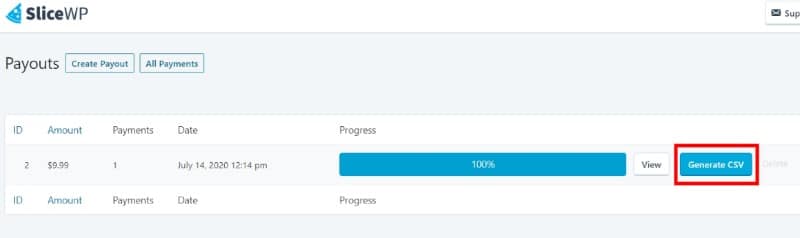
All you have to is click on Generate CSV, and SliceWP will generate a CSV file for you automatically. Containing the info, you need to make payments see below output:
| ID | Name | Amount | Currency | |
| 2 | ben LayerWp | xxxxx@gmail.com | 9.99 | USD |
Then it’s down to you to pay your affiliates via whatever methods you wish!
Removing Products From An Affiliate Program/Disallowing Them
You may have products that have a low margin; however, they’re hot ticket lines, i.e., popular, but with minimal profit. You don’t want them to be available to affiliates for promotion as you’ll make nothing on them.
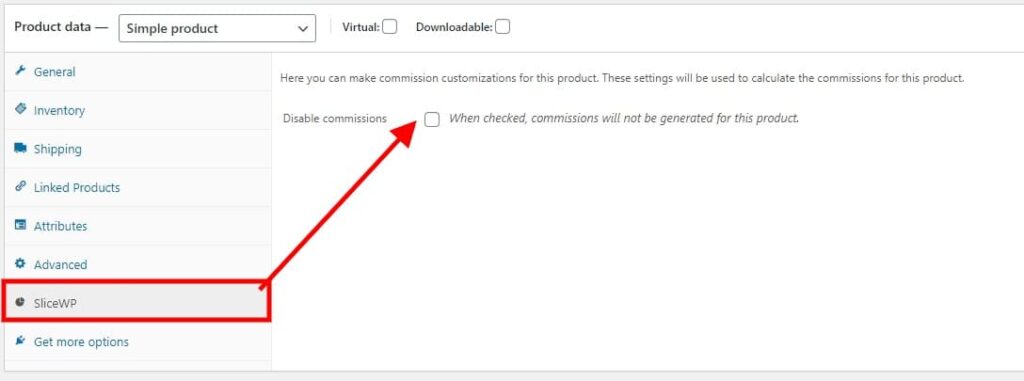
A quick check-in this box will prevent commissions generated for the product in question. Saving you from hemorrhaging money if the margin is low. An excellent feature indeed.
Benefits Of Creating A WooCommerce Affiliate Program With SliceWP
You can see from my review that you don’t have to dip your hands in your pockets to create an affiliate program for your WooCommerce shop when using SliceWP.
- No initial outlay, create an affiliate program with SliceWP when your ready, upgrade for more functionality.
- Let affiliates become your marketing team; they don’t refer any sales; they don’t get paid.
- No cost for running adverts.
- Approve or reject commissions based on your rules.
Drawbacks To Running Your Own Affiliate Program
- Compared to affiliate systems, like Shareasale, Affiliate Window, your program will lack visibility, and the aforementioned are marketplaces, with a high profile.
- You’ll have to actively promote your program, I’ve got some tips on that here.
- Time, it takes time to manage an affiliate program, and you will need to allocate time in the week to manage affiliates and payouts.
Premium Extension For SliceWP
- Reports Add-on: Find out more about this
add-on on SliceWP , or read my take here. - Product Commission Rates Add-on:
View on SliceWP or take a look at my article covering it here. - Affiliate Commission Rates Add-on:
Find out more here , or read how to use it here. - Custom Conversion Add-on: Not covered this, so please take a look
over at SliceWP to find out more. - Affiliate Coupons Add-on: Covered this in a tutorial here, or
view on SliceWP here . - PayPal Payouts Add-on:
View on SliceWP for more details. - Recurring Commissions Add-on:
View on SliceWP for more information.
How Much Does SliceWP Cost?
There’s a three-tiered approach to pricing for the plugin. Each tier has more add-ons available.
The Personal license comes with the following add-ons: Reports, Product Commission Rates, Affiliate Commission Rates, and Custom Conversion.
Price: $99.00 per year for one site license.
The Extended license has all of the above and includes the Affiliate Coupons add-on.
Price $159.00 per year for a three site license.
Professional comes with all that the Personal/Extended license offers, plus the PayPayl Payouts and Recurring Commissions add-ons.
Price $219.00 per year for a ten site license.
I think the pricing is very fair considering the return you could potentially get and the features on offer.
For those undecided, SliceWP also offers a 100% money-back guarantee. If you’re not satisfied, you can request a refund within 30 days of your purchase.
Final Thoughts
With any affiliate program plugin, you need to think outside the box, would the outlay of $99.00, $159.00 or even $219.00 benefit my business and increase sales?
Sure, with a couple of decent affiliates, you could make that back relatively quickly, an affiliate program plugin is an investment for your business.
Using SliceWP, you could grow your WooCommerce store, with a clean, comfortable to use (as an affiliate), and easy to maintain affiliate program.
I’ve had a great time with SliceWP, and I hope, you reading this far, can see how it could help you set up an affiliate program for your WooCommerce store.
Set up took minutes to do, and through some in-depth testing, I’ve learned a thing or two myself. Which I have to honest is great for me as an individual, picking up new ideas and skills.
If someone was to come to me and ask me how to set up an affiliate program for their WooCommerce store, I could do just that, thanks to SliceWP.
In all seriousness, if you’re looking at taking the first steps at setting up an affiliate program for your WooCommerce store, give SliceWP a try. Start for free, then scale your operations if need be, or go all out and choose a license that’s right for your needs.
Follow my instructions, and you’ll do just fine. A rock solid plugin, highly recommended!
SliceWP Review Score
| Criteria | Score |
|---|---|
| Functionality | 4.5 |
| Ease of use | 5 |
| Documentation | 4 |
| Potential to generate revenue | 5 |
| Ease of use as an affiliate | 5 |
| Overall Score | 4.7 |
Subscribe To My Newsletter
Read it? Share it!
Leave a Reply