How To Take Screenshots For Blog Posts. In Seconds. For Free.
I found something quite cool on Producthunt. I’m often floating around there, occasionally dipping, looking for new things to help with blogging.
I use a lot of screenshots in my content here on LayerWP, and I use Canva to manipulate images, take a look at a review I did of Canva here, if you’d like to know more about it!
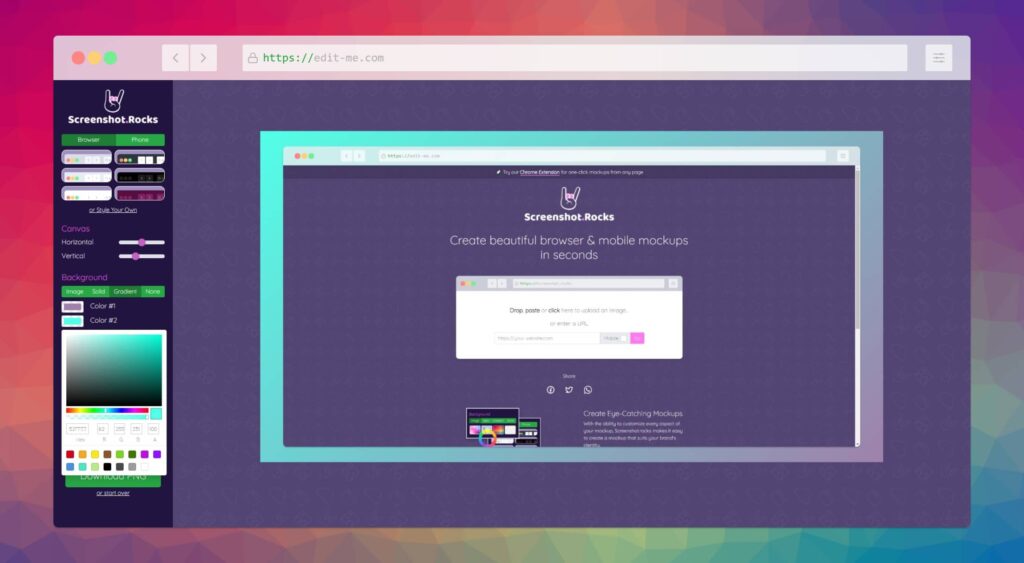
The main issue I have is it takes time to create an image of a website I talk about, so it makes sense to save time where I can, take a look at the below:

Looks good, right? It took me around 5 seconds to make. How did I do it?
Using Screenshot.Rocks.
What Is This Screenshot.Rocks You Speak Of?
While Screenshot.Rocks isn’t a WordPress plugin; I still think it’s more than worth mentioning on my blog. The purpose of (I’m going to call it SR from now on) is to enable users to make web browser and mobile mockups quickly (in my case, 5 seconds).
Another screenshot using SR:
Well, the above is a screenshot of Screenshot.Rocks used in a screenshot. That’s a mouthful. I promise I’m not keyword stuffing here, just telling you as it is!
How To Use Screenshot.rocks
There are two different ways to use SR; the first is to visit the website and drag and drop an image or insert a URL. See below:
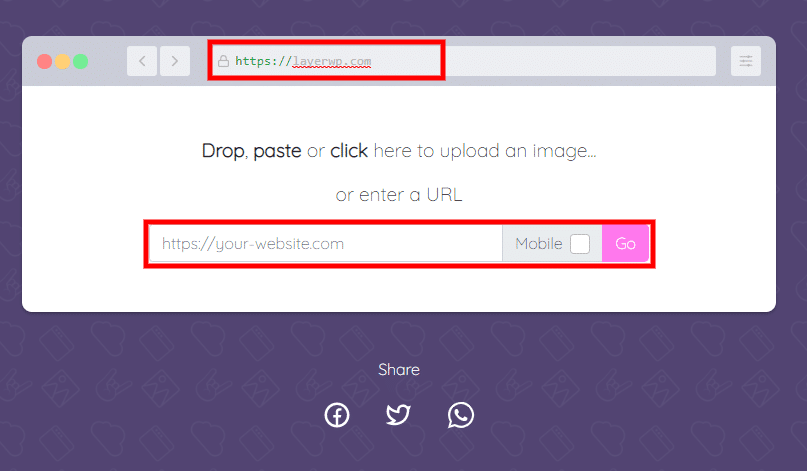
From the above, you’ll note the https:// field; you can add your blog website URL or URL to a specific page. Have an image already?
Drag and drop it into the box, or click to add an image from a folder. Choose whether you’d like a mobile mockup or not, hit go then tinker with the settings. (More on that later).
The other method? Well, SR has extensions specifically for the following browsers:
- Firefox
- Chrome
- Edge
I’ve checked the permissions (as I use Chrome) and can confirm there are no erroneous callbacks, or anything dodgy going on here.
Screenshot.Rocks is open source, so if you’re more technical than I am, you can see how it processes images, and for the record, they don’t store image data on their servers.
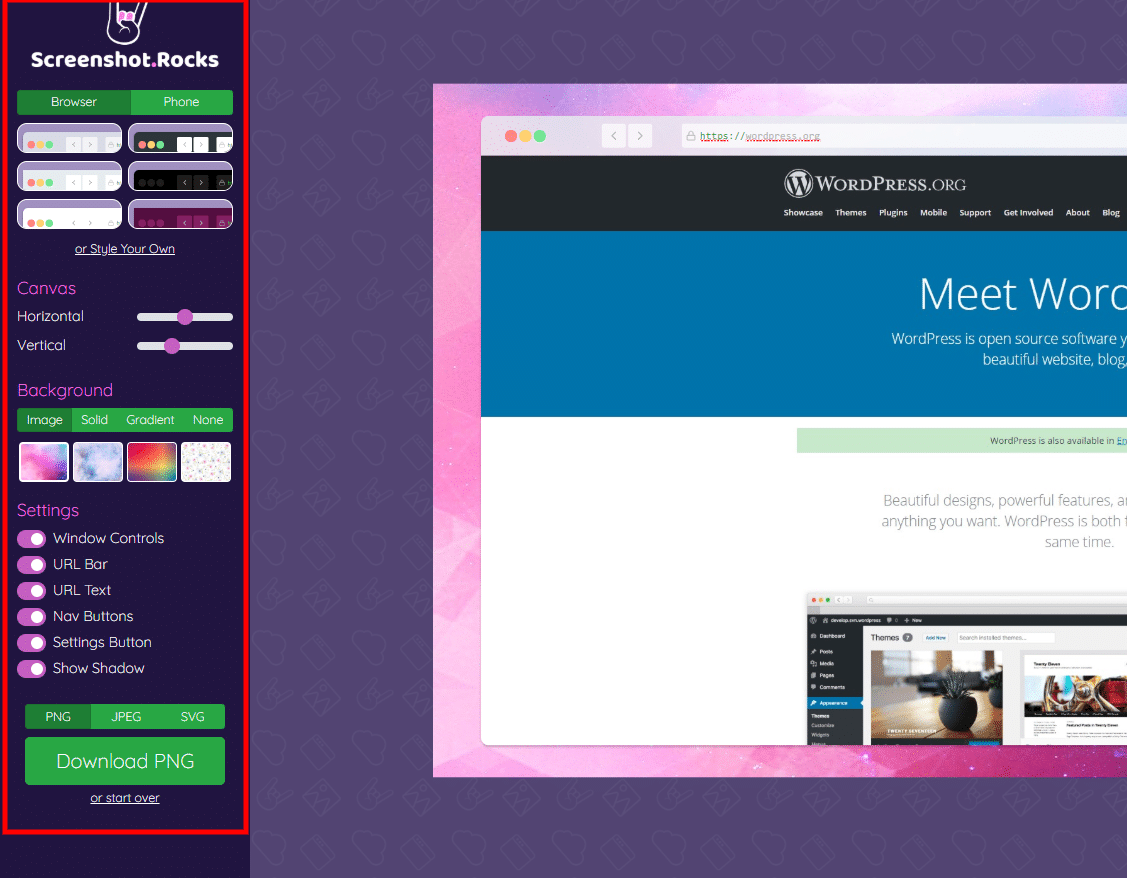
The Screenshot.Rocks Interface, What Can It Do?
Simplicity is key here, and SR does not disappoint. It’s a breeze to use and makes taking screenshots of websites or styling images for blog posts a cinch.

Next, I’m going to show you the user interface in a little more depth. Please take a look at the below for how it works.
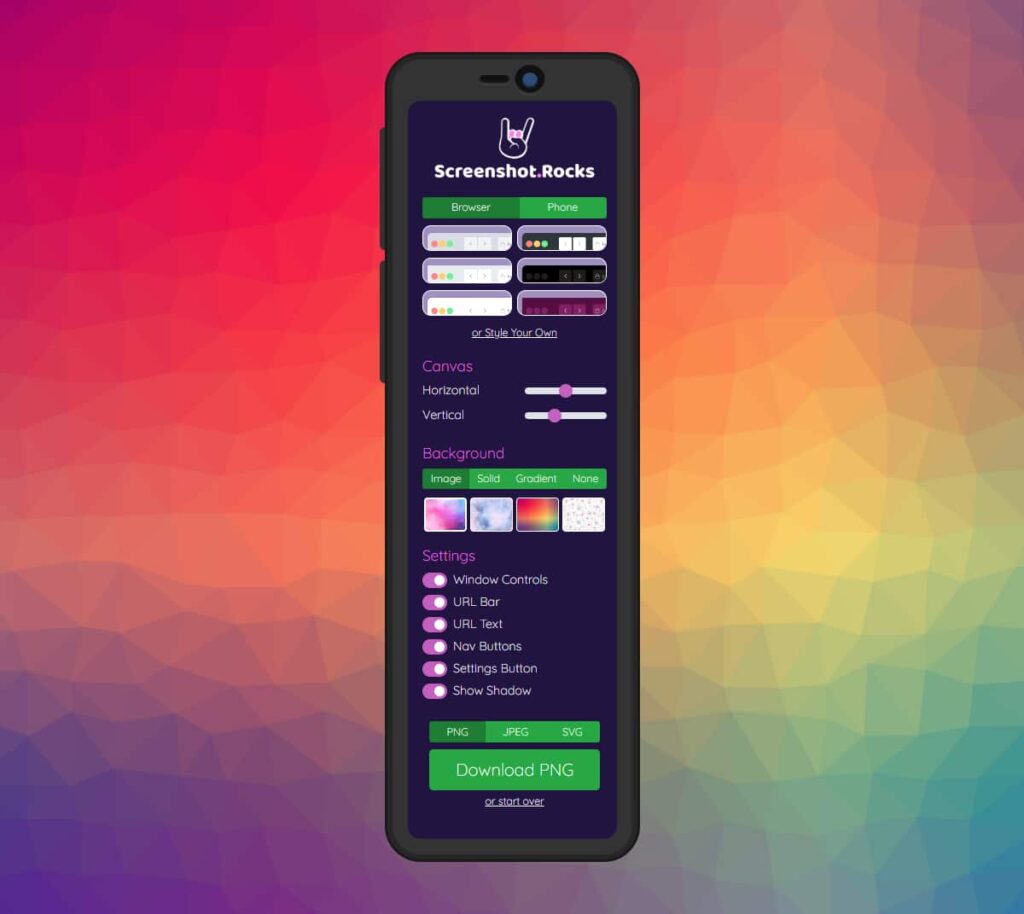
Yes, the example above is a screenshot of the UI, then using Screenshot.Rocks, I’ve set it to mobile display.
Choose between a mobile or desktop screenshot, and the viewport will switch to reflect your choice.
The next section gives you the option to choose the browser bar’s style, and if you wanted to, you could even style your own.
Canvas, these sliders let you set the horizontal/vertical padding around your screenshot.
Background, choose from Image, Solid, Gradient, or None. There are three presets for the Image background; unfortunately, you can’t upload your own. The Solid/gradient options have color pickers so you can choose a color to reflect your website.
Another cool feature is the download section here you can choose from PNG, JPEG, or even SVG!
Great For Bloggers, Great For Designers
Screenshot.Rocks, is perfect for bloggers who’d like to have stylish screenshots of websites as part of their content. I’d also hazard a guess, WordPress developers working on themes/plugins could benefit from this as well!
Screenshot.Rocks is entirely free to use, and it takes mere seconds to create sleek looking screenshots for blog posts or design mockups. Well worth checking out!
Subscribe To My Newsletter
Read it? Share it!
Leave a Reply