First Data Connect For WooCommerce Review
It’s only been over a week and a bit since I did a review, then another comes along, a bit like buses I suppose. You wait for one; then two show up at once.
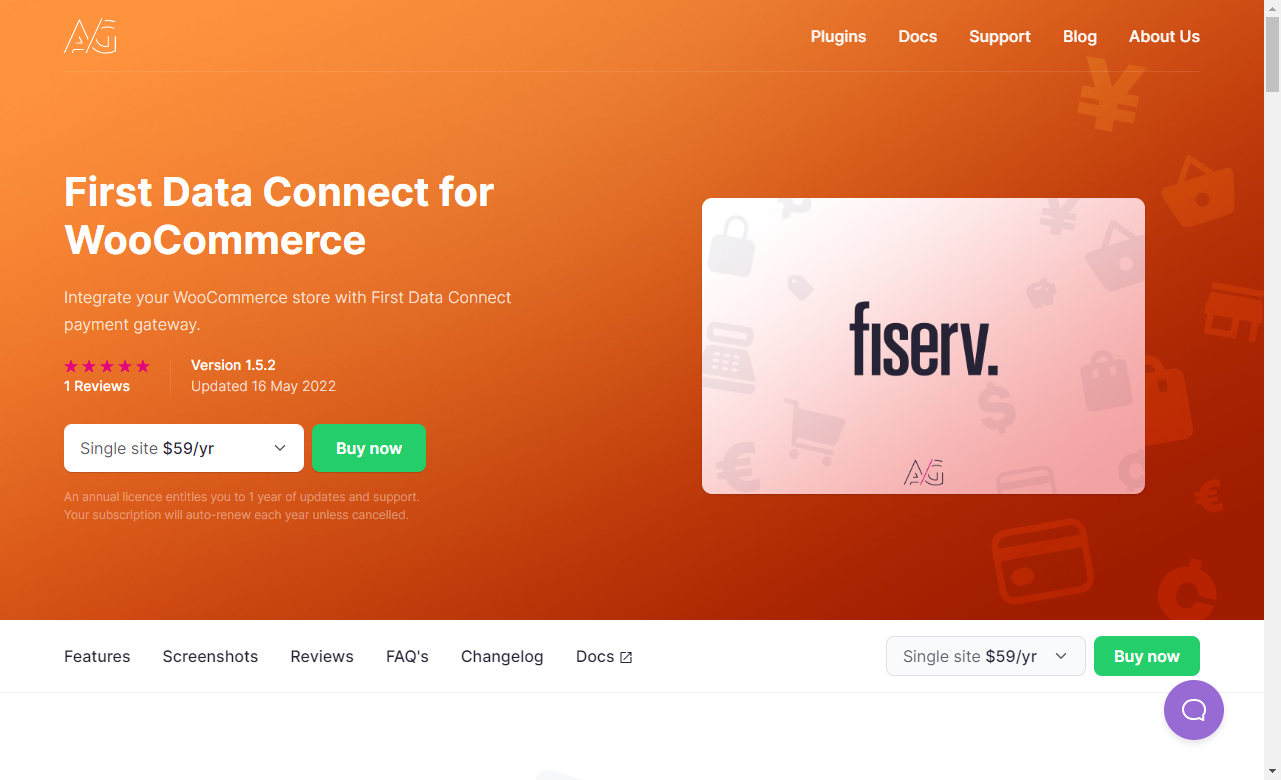
Anyway, I’m waffling. Today I’m looking at a plugin from the team at We are AG, First Data Connect for WooCommerce.
Payment gateway plugins are not exactly the most interesting of topics, right? Without them, you wouldn’t be able to sell anything online, so they’re paramount.
So there you go.
Review setup
I’ll do the usual, create an instance of WooCommerce using my new favorite tool InstaWP (check it out), create a blank install save for WooCommerce, and of course the First Data Connect plugin.
The developer has given me a copy of the plugin for testing, and they’re keen to get my thoughts and experience.
Disclosure
For the record, this is a paid review, and crossing my palm with silver, will not assuage my opinion, if the product has a fault, I will mention it.
The review may contain affiliate links; these help me keep on keeping on and will not affect you in any way. I make a small commission if you purchase through any of the links.
Sounds good?
Let’s get cracking, then.
About First Data
First Data has been in the Fintech (Financial Technology) space since 1986, servicing merchants the world over. With over six million merchants globally, they’re a massive company with a huge customer base.
If you’d like to learn more about First Data, please do so here.
About We are AG
We are AG offer a range of payment processing solutions specifically for WooCommerce, they’ve been around for a while now, and have plugins for Barclaycard, Ingenico, Authipay, Tyl, Viveum Opayo, and 2Checkout to name but a few.
Payment processing plugins don’t get enough air time, truth be told, especially when you have the likes of PayPal, Stripe et al. Here’s the thing, though, not everybody uses the aforementioned or wants to use them.
Having a company specialising in alternate payment processors is a good thing, it opens up choices for the store owner.
In this review, I’m not evaluating First Data Connect, I’m reviewing the plugin itself. So don’t expect lots of complicated words about payment rules, PCI compliance and such. Hell, I’d be lying if I said I knew anything about that.
This review is for people who are thinking of using the First Data Connect plugin and currently use WooCommerce, you need to know if it works, and how easy it is to use.
Payment plugins can be a pain
There’s no two ways about it, sometimes setting up a payment plugin can be a royal pain in the rear, all you want to do is start selling. So let’s see how easy all this is, and remember this is a blow-by-blow, AKA real time review.
I’ll list things as I see them and document them as I go. The best way to do a review (in my opinion) helps you make a more informed choice whether a product is right for your needs.
How much does First Data Connect cost?
The plugin is available in three different pricing options, excluding local sales tax:
- Single site license: $59.00 per year
- Five sites: $139.00 per year
- Ten sites: $199.00 per year
So, clean and clear pricing from the outset (minus the sales tax based on your Country of origin). All pricing entitles you to updates and support for one year, so if you have issues, they’ll be on hand to help.
Purchasing First Data Connect
As mentioned, I’ve gone ahead and installed WooCommerce, jumped through some hoops, and got an installation ready to go.
We are AG are using Freemius as their sales solution for all their plugins. Weirdly two reviews of late and both using the same platform! I digress.
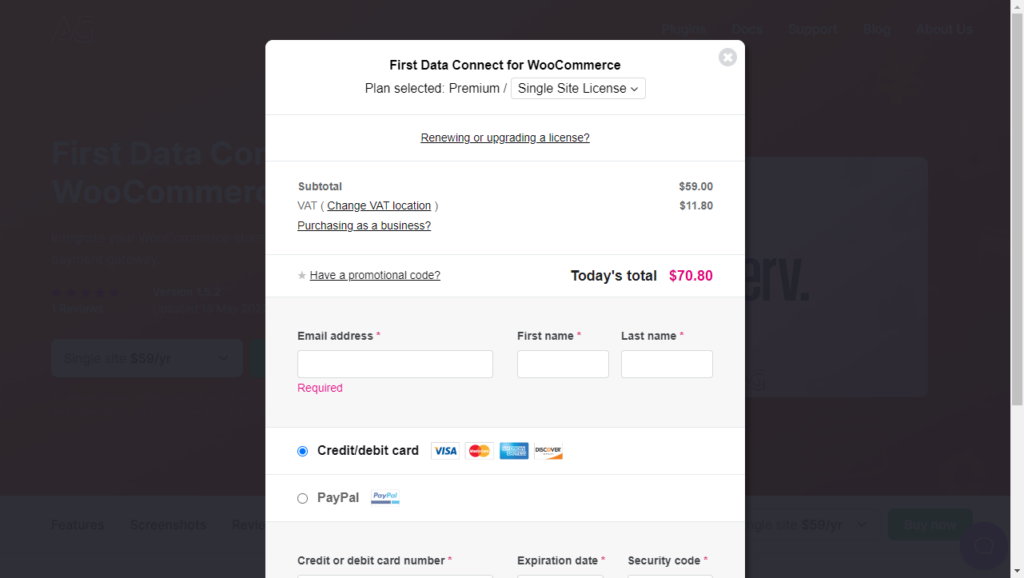
Visiting their website, and clicking the buy button will give you some options, to choose the relevant license type, fill in the details, card details and such.
After that, you’ll receive an email with instructions on how to download the plugin, grab the license code.
Installing the First Connect Data plugin
I’m always cautious when it comes to installing new plugins/themes on a site. What wonders will await, will it turn my dashboard into a glittering mess of adverts that I’ll never be able to dismiss?
You know, and I know who the main offenders are when it comes to this kind of behavior, let’s hope it’s not the case here.
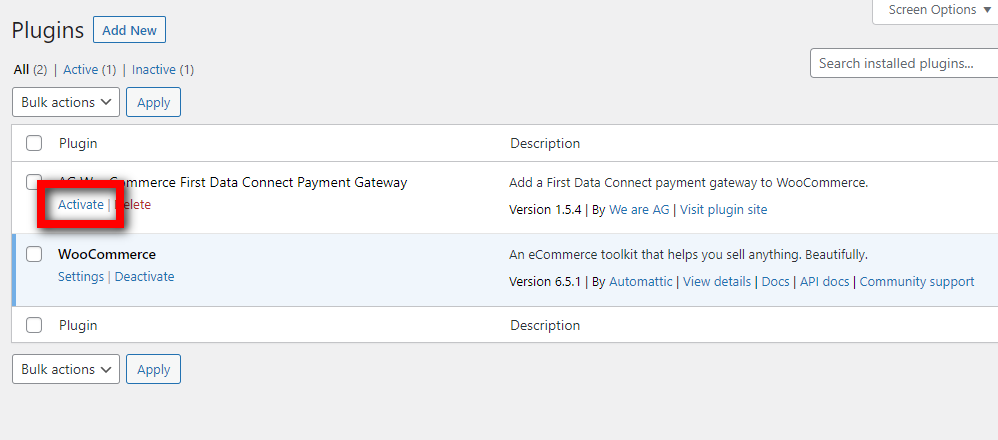
See below for what happens:
Install wizard ahoy!
I’m always skeptical about installation wizards. Especially when they take over the whole site, as is the case with the FDC plugin (First Connect Data).
That said, I really don’t want to make a mistake during setup, especially with something as important as a payment solution.
With that mindset in place, I can see why no other options are available, other than the “I don’t need help setting up.” link at the base of the wizard.
I’m sure as hell not going to click on that link, in this instance, I’ll take the help, thank you very much.
This is a four step process, I’ll break it down for you.
Installation. Step one
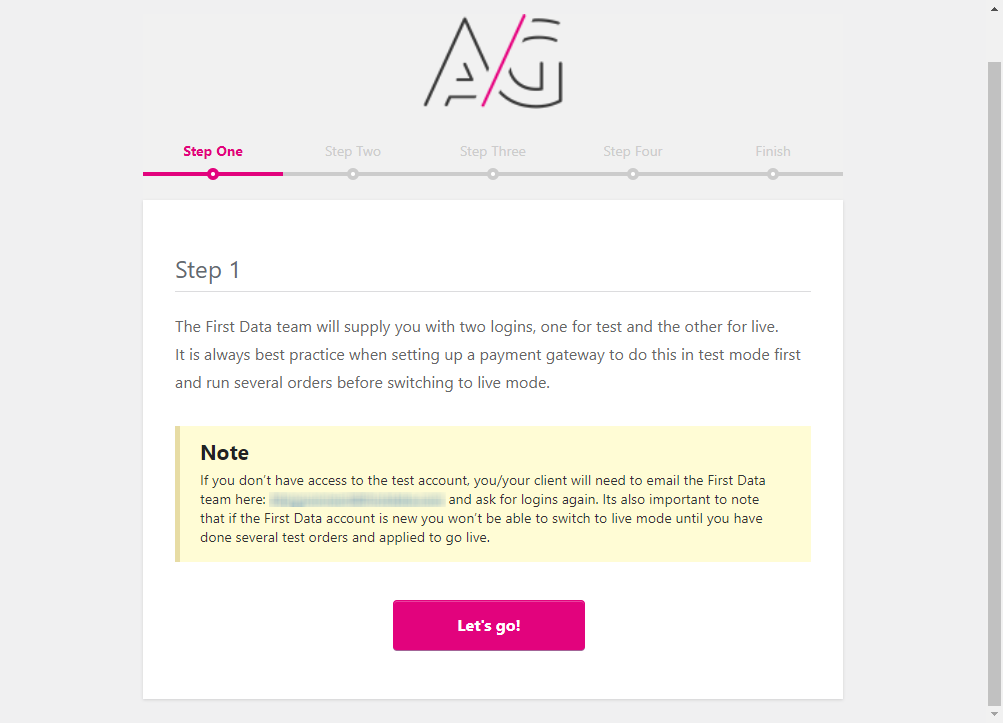
I’ll be honest I’m not a huge fan of cutting and pasting documentation from a plugin, it looks lazy, but, and there is a but, it needs to be done in this review. A screenshot is all well and good, but you need more info.
First part of the description:
The First Data team will supply you with two logins, one for test and the other for live.
It is always best practice when setting up a payment gateway to do this in test mode first and run several orders before switching to live mode.
Second part of the description:
If you don’t have access to the test account, you/your client will need to email the First Data team here: xyz@email.com and ask for logins again. Its also important to note that if the First Data account is new you won’t be able to switch to live mode until you have done several test orders and applied to go live.
I’ve purposefully hidden the email address for the teams at FDC, it’s the right thing to do, no doubt email spiders will try to inundate them with junk!
The descriptions explain all you need to know about using First Data Connect in the beginning.
You’ll need to do some testing beforehand, this will save you in the long run, you don’t want to use a payment processor that’s going to throw up errors and lose you a sale.
Where possible it would be best practice to set this up on a staging domain then push to live once you are ready, for your peace of mind, and more importantly, your customers.
It’s at this step, I’d like to say We are AG have the store owner’s best interests at heart. Not only for the full screen wizard, but guiding you through the process.
It’s been clear instructions so far.
Installation. Step two
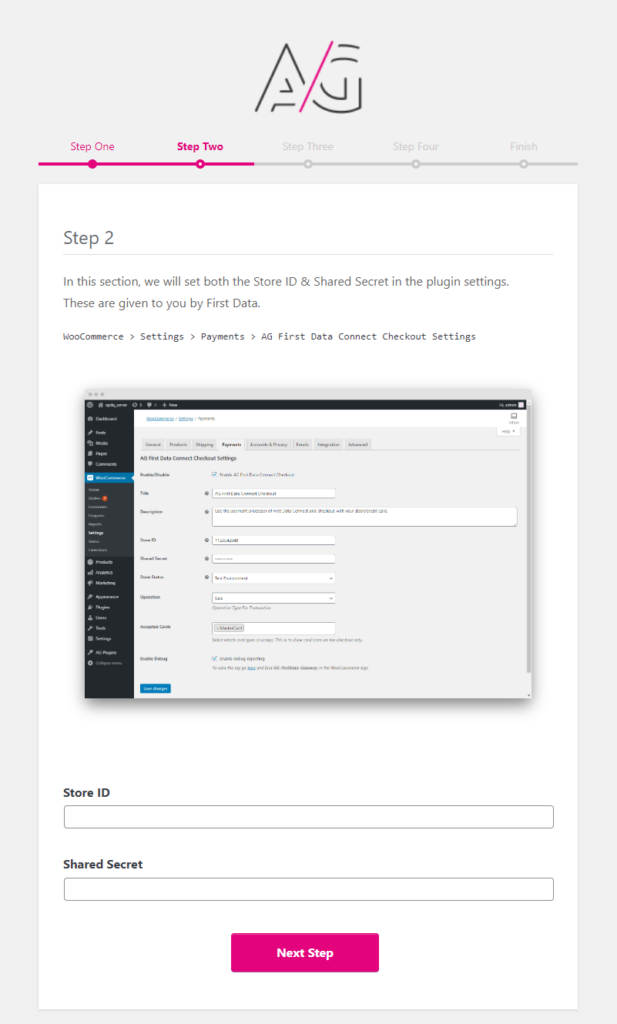
Step two deals with your store ID and your secret key. As per the instructions, you’ll need to email First Direct to get these.
Once you have them, it’s a case of cut and paste here. Again a guided process, and let’s face it, we want this to work for us and our customers.
Installation. Step three
Now this is where it gets interesting, see below for what I mean:
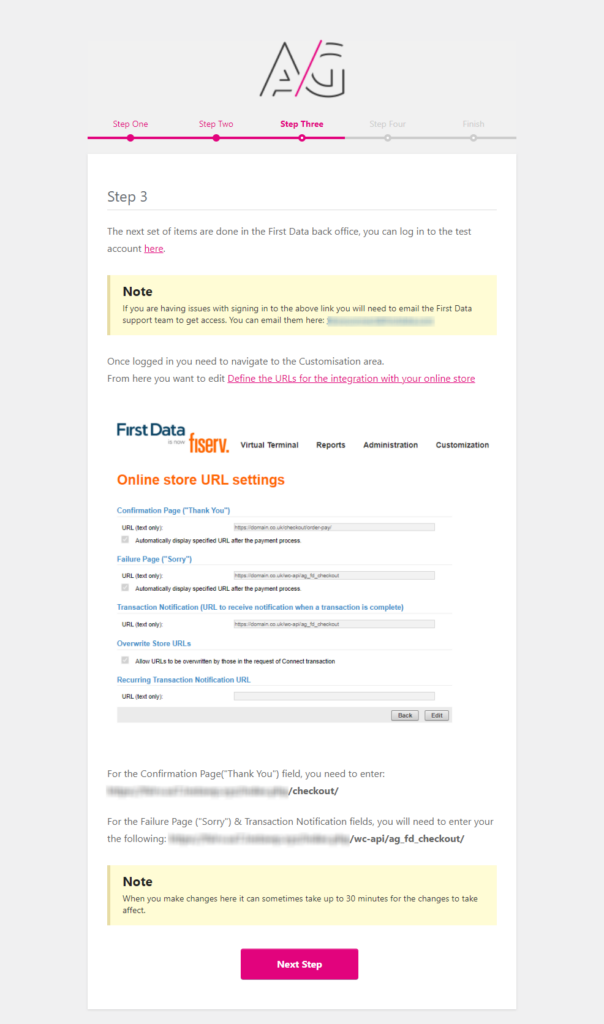
What I like about this, is how clear it is. I get the feeling if you’ve never used FDC before, some might be a little overwhelmed with the process.
Some could be prone to making mistakes or some trial and error shenanigans. Not so with this plugin, care has been taken to ensure you don’t fall foul of errors.
The instructions here tell you exactly what you need to do, the appropriate URLs you need to add in the FDC Virtual Terminal to get up and running.
At the base of the example image are the EXACT URLs you need to enter and where to put them. Top marks so far. Nice and simple.
There’s even a notice to inform you it could take 30 minutes for everything to kick in their end. So sit back, make a coffee, do the washing up or something else constructive.
Installation. Step four
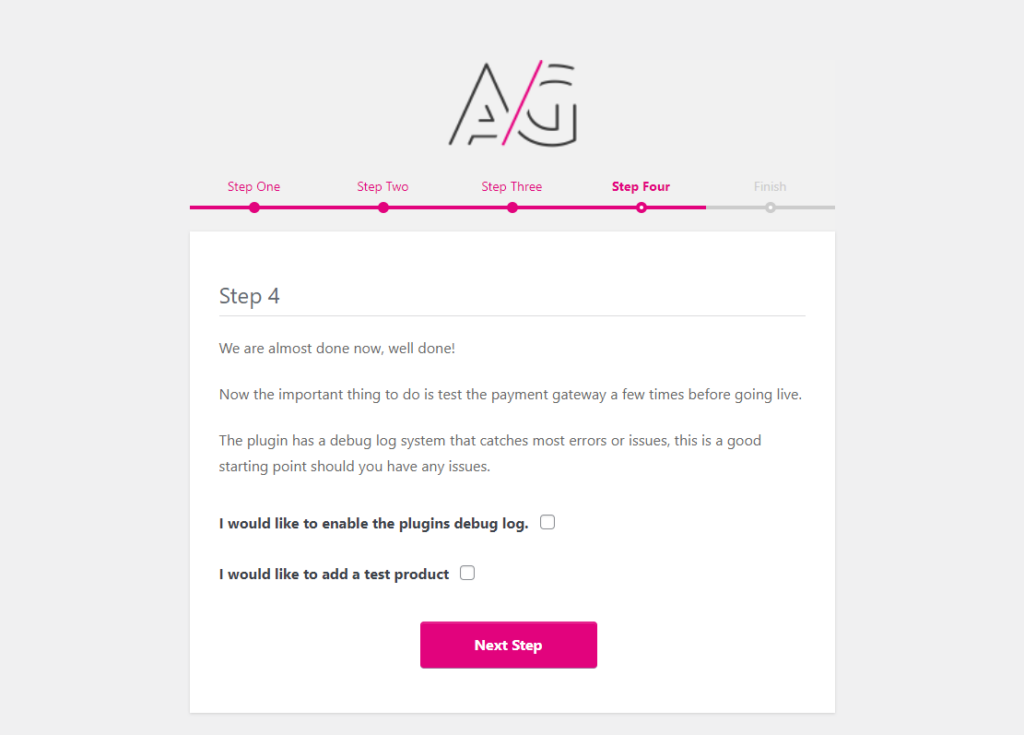
As the image mentions, we’re almost done (pats self on back). This step deals with enabling the debug log, should you encounter any errors, a log will record findings. Below this, the option to add a test product.
As this is a barebones installation with no products, I’m going to tick this check box and add one.
Finished
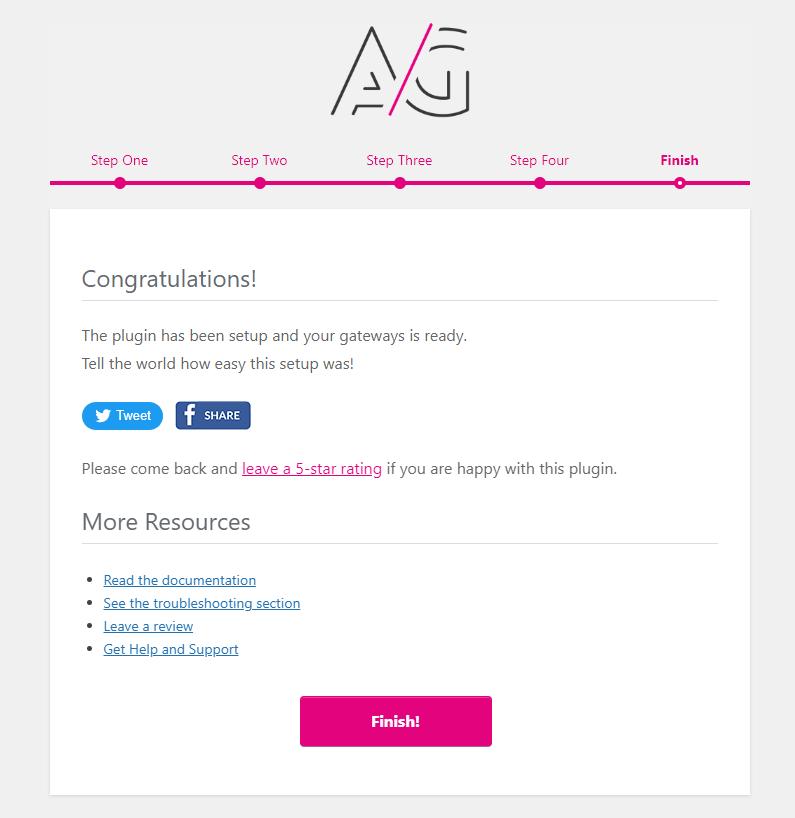
So we’re done with the plugin settings, here you’ll see a congratulations screen, with options to share on Twitter/Facebook, along with resource links for documentation, help, and troubleshooting etc.
Thoughts so far
Well, wizards can make or break a plugin installation. Too much info can harm a user, especially if it’s a long-drawn-out affair, users could be liable to skip important info.
When it comes to payment processors, it makes sense to take over the admin and focus purely on setting up the payment side of things.
The process was on point and explained without overwhelming me with various settings.
Payment settings overview
Before we look into the test product, let’s see what settings are available for the FDC plugin. Navigating to Settings in WooCommerce, then Payments, you’ll see the below:
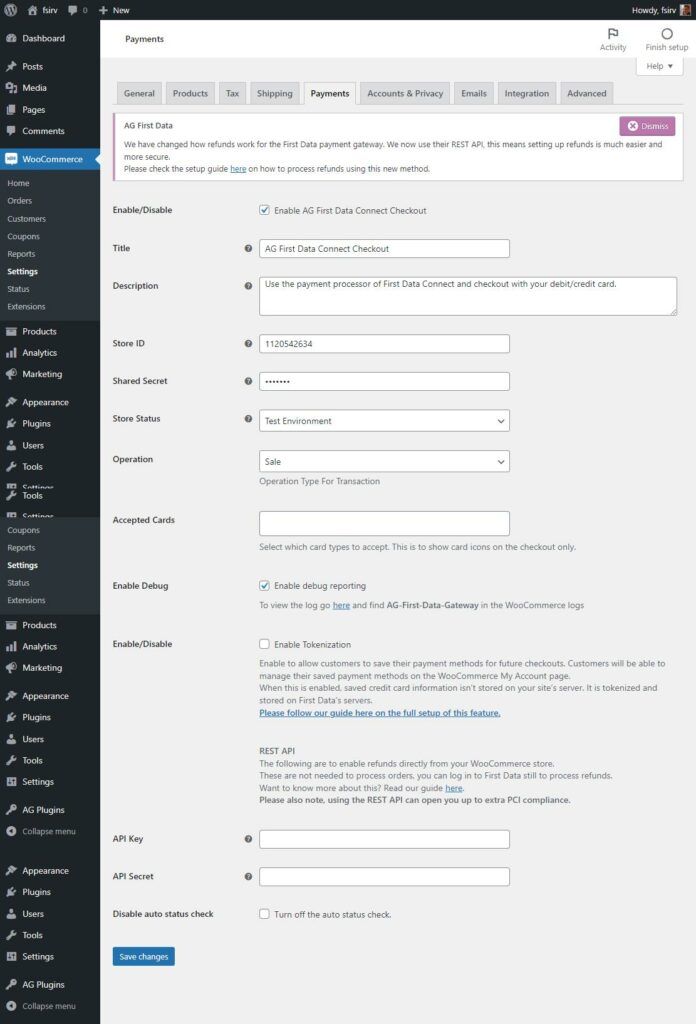
Quite a few things to go through here, so let me break it down. First the prompt about refunds:
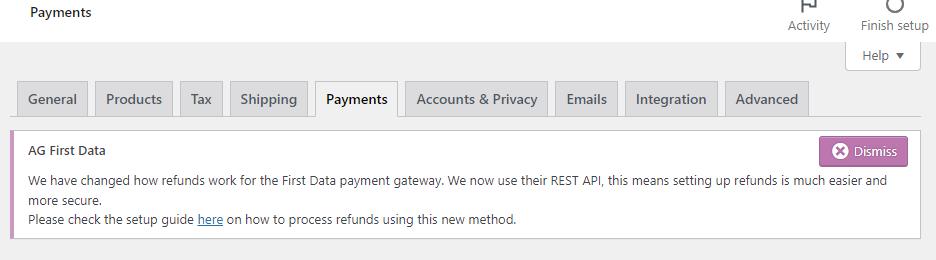
New Refund method using the First Data API
Accessing the documentation link, gives a clear explanation how to use this new method, with screenshots and instructions step by step. I’m not going to talk about this here, when the documentation explains it so eloquently.
The API method is optional, you can still refund using the First Data Terminal, or request an API key for your store, requesting an API key can take 1-2 workings days.
Section one of payment settings
Check me out, sections, fancy. Anyway, it’s easier for me if I break down the page into sections and cover what they offer.
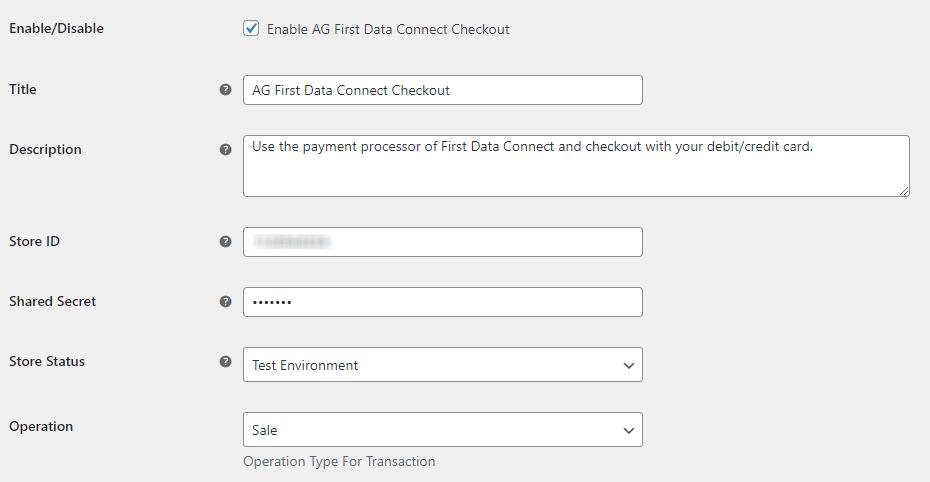
First up, Enable/Disable, simple enough. The next two options, Title and Description, allow you to change the name and text description of the gateway. This will display on the checkout, so fill your boots on what you want to name/describe them as.
Store ID/Shared Secret, this information from your First Data Virtual Terminal, which was added as part of the installation process.
Store Status, Test Environment, or via the drop-down, Live Store. Operation, from the drop-down menu, Sale, or Pre-authorization.
Section two of payment settings
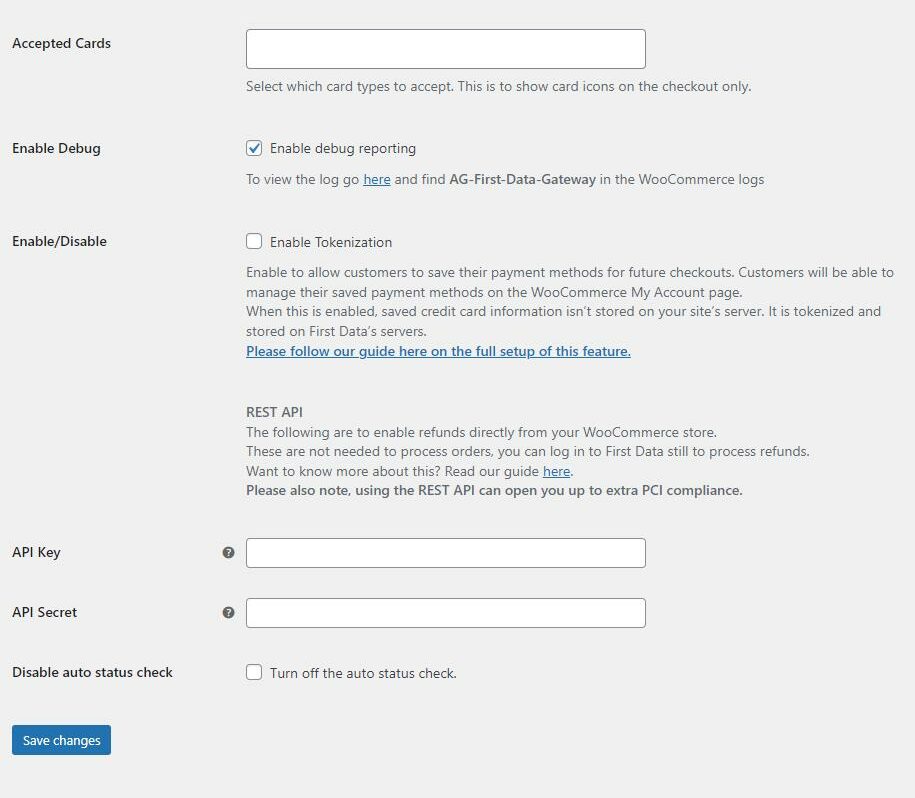
Accepted Cards, here you can add from a range of cards to First Data accepts in your store, the options are:
- MasterCard
- American Express
- Maestro
- VISA
- JCB
A useful feature, perhaps you have one card type that charges a higher transaction fee than the other, or you want to simplify things for customers by only accepting one or two.
Highlight the cards you want to accept when clicking on the box and save your progress. See below for an example of two cards selected:

Note: whatever you choose here, will automatically display the associated payment logo for the card(s) you choose, at the checkout.
Special note: If you want to block the use of a specific card, such as AMEX (or others), you will need to contact First Data directly. They will enable/disable cards on a case by case basis. This is a god send. Especially for those who don’t want to allow the use of a card, due to any exorbitant fees in place.
As part of the installation, I ticked the box for Enable Debug. As you can see from the screenshot, it’s already ticked. There’s a handy link for you to click on the WooCommerce debug log and specifically look out for the text AG-First-Data-Gateway.
Enable Tokenization. This option allows your customers to save their chosen payment methods for future purchases. No payment data will be stored on your server, this all housed on First Data’s servers, that’s one less headache to worry about!
API Key/API Secret, if you decide to use First Data’s API for the processing of refunds, this is where you’d cut and paste the key and secret you were given.
There is a note mentioning: ‘Using the REST API can open you up to extra PCI compliance.’
I’m not an expert on PCI Compliance, but I did manage to find a resource that might help if you’d care to know more about it here.
Auto status check
You may or may not have noticed the checkbox, entitled Disable auto status check. This is a cool feature and a recent addition to the First Data Connect plugin.
In order to explain see below:
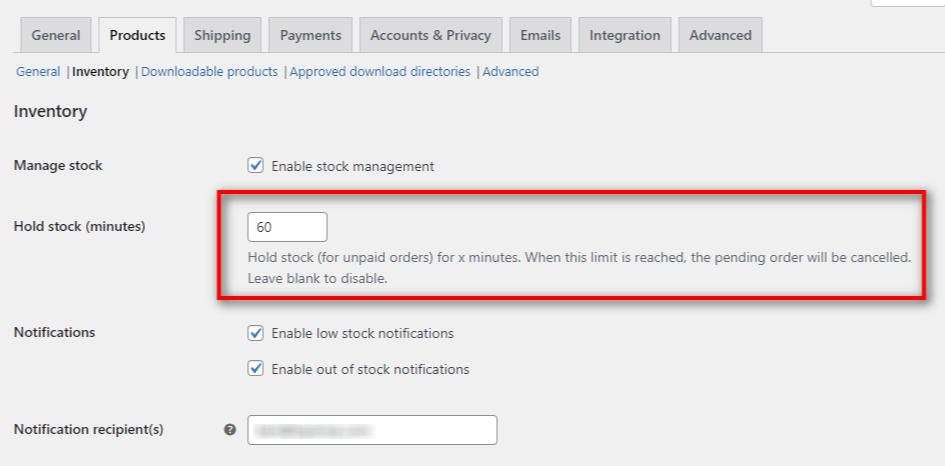
WooCommerce has a setting to adjust how long stock should be held for. This particular setting is here: WooCommerce > Settings > Products > Inventory.
You can adjust the time held of stock (in minutes), or leave it blank to disable it.
Imagine you have a customer on your site at the checkout stage, they’ve added they’re items to cart and checkout.
Then they get distracted, open another tab or close the page, as they’ve moved on.
This particular setting will hold that stock allocated to that potential order, and in my case for 60 minutes.
If they never come back and the item only has a select amount of stock in place, it’s preventing you from selling the product for the time in minutes allocated here.
The First Data Connect auto status check is enabled by default, you can turn it off if you wish. What this setting does, is check to see if a payment has been made prior to them leaving the cart to do something else.
Which I’m sure you can agree is pretty darn useful.
You can manually check orders, by visiting one and clicking on the button below in your order management screen:

Personally? I’m leaving this setting on, it’s one less headache for me to worry about!
Thoughts so far
Again, easy to understand, although the screenshot looks lengthy, it really isn’t a long-winded process. If you were new to WooCommerce, I don’t think you’d struggle with this, it’s nice and clear.
Love the auto status check functionality, I can see this from a store owners point of view, and how much time it could save.
The test product
As part of the installation, you’ll probably remember, I ticked the box for installing a test product. So let’s take a look at what this entails.
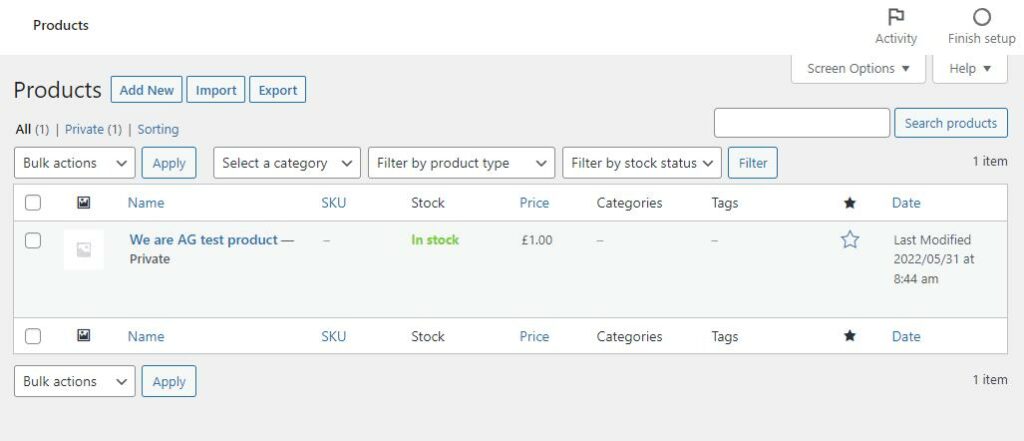
A quick navigation to our products overview in WooCommerce reveals the new entry:
There’s not much to write home about in terms of the actual product page for our test product. So I won’t waste your time showing you that.
Suffice to say, it creates a product with a nominal sum (in my case) of £1.00. If you’re using a default currency of your own choosing, then this will be in the same denomination.
It’s worth noting that this product is set to Private. This means it won’t show to anyone but you, which is an incredibly handy way of testing out the checkout when you’re testing.
What I’m really interested in is seeing how this all works from a test perspective.
Testing the checkout
Forgive me for skipping a couple of steps, I’ve gone ahead and added the test product to the cart. What’s interesting is the notice. Take a look at the below to see what I mean:
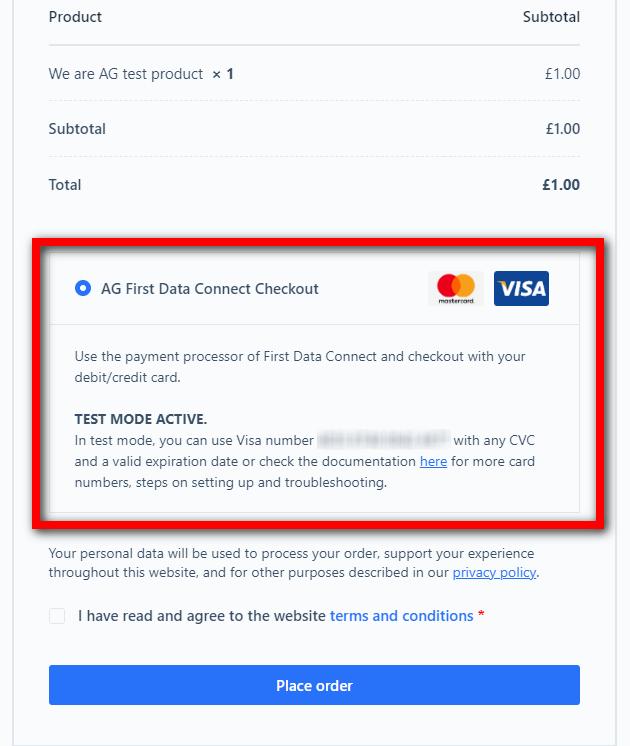
For me? As a store owner and testing out the transaction process, this is worth its weight in gold. I’ve blurred out the card number (it’s a test card), I can cut and paste this as part of the process, allowing me to test thoroughly.
A useful feature, no scrambling around or reading docs to find a test card, it’s there, right in front of me.
Gateway Checkout
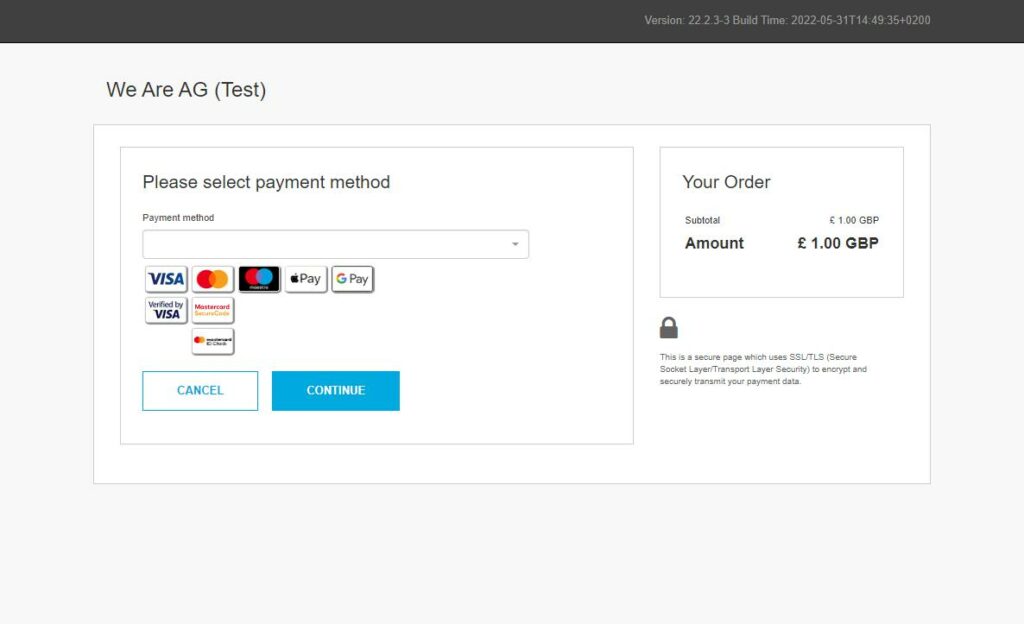
The above is what customers will see. Looks a little bland right? Well, using First Data’s customizer you can make some changes that are more in keeping with your design.
There’s no two ways about it though, whatever design choices you make it will still look similar to the above.
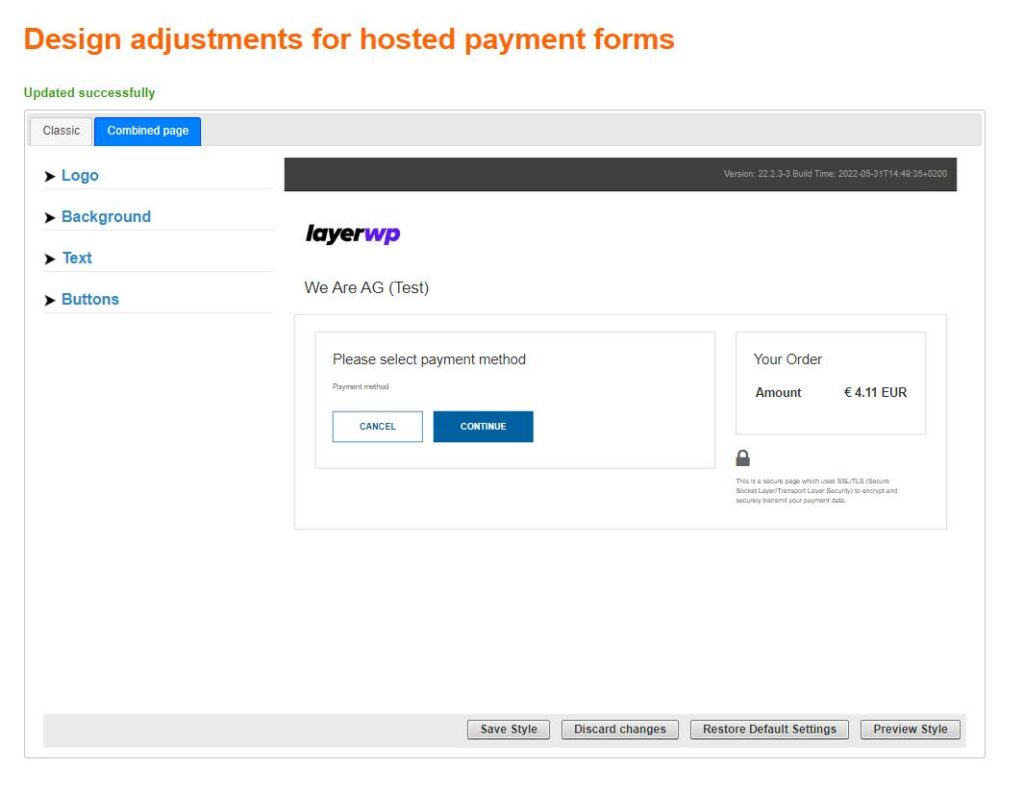
See below for an example:
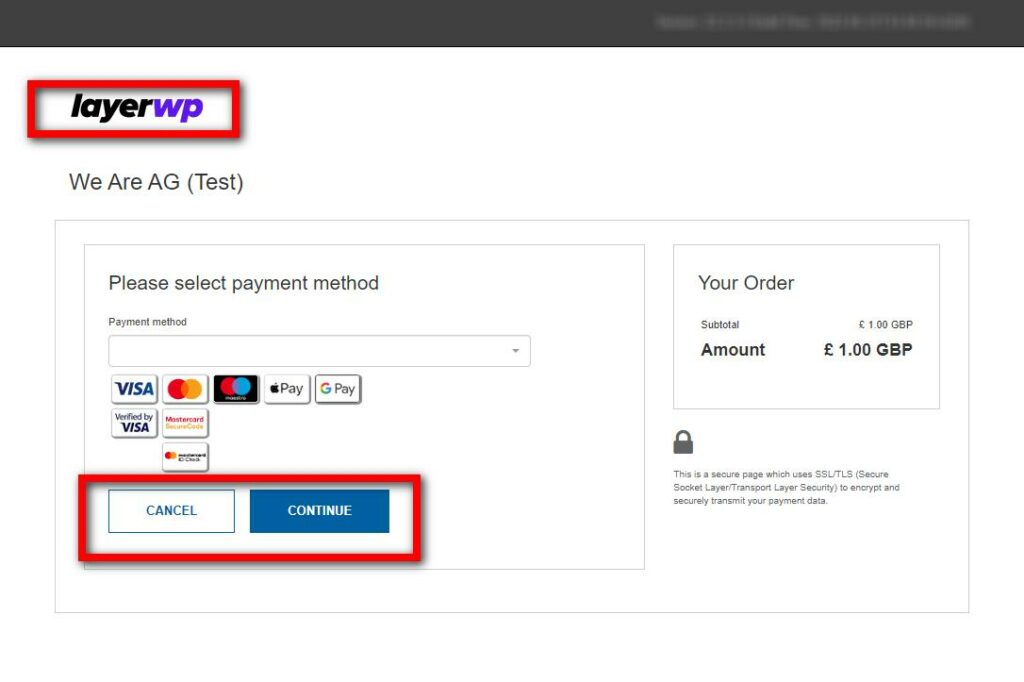
This is no reflection of the plugin itself for the record, this is down to the settings of First Data. See below for customization options for the gateway from First Data themselves:
I didn’t really want to touch on First Data. Not me being an ass, but I wanted to focus on the plugin, not the service.
This is in no way a fault of the developer of the plugin, but you are, and it’s important to note, at the mercy of the gateway.
Design options are limited, take a look at the above for what I mean. Sure, you can change the logo (upload your own), choose a background color and other options.
Your options are limited. This isn’t an attack on the developer We are AG. These are the cards they have been dealt, they integrate, and what they do, they do it well.
Issuing a refund
Using the details provided by the plugin and the First Data Connect Virtual Terminal, I’ve gone ahead and placed an order using the test card. I want to see how easy it is to issue a refund, using the new API method.
Nobody likes processing refunds, however, it’s part and parcel of running an online store. The customer is always right, as they say.
At some point you’ll need to do this, whether it’s an error on your part or the customers. Whoever is at fault, the process needs to be quick and clean.
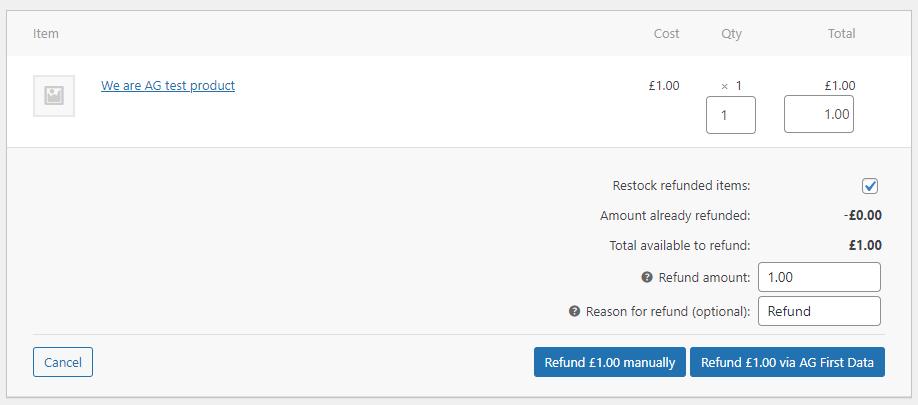
As you can see from the screenshot above, I’ve opted to put the item back into stock, and nominated a sum to refund. In this instance, I’ve chosen the full amount.
If, however, your product was made via a sum of parts, and the customer wanted to drop an item, you could add a specific amount to refund. Another useful feature and one that will save you time and your customers.
Clicking on Refund via AG First Data, you’ll see this:
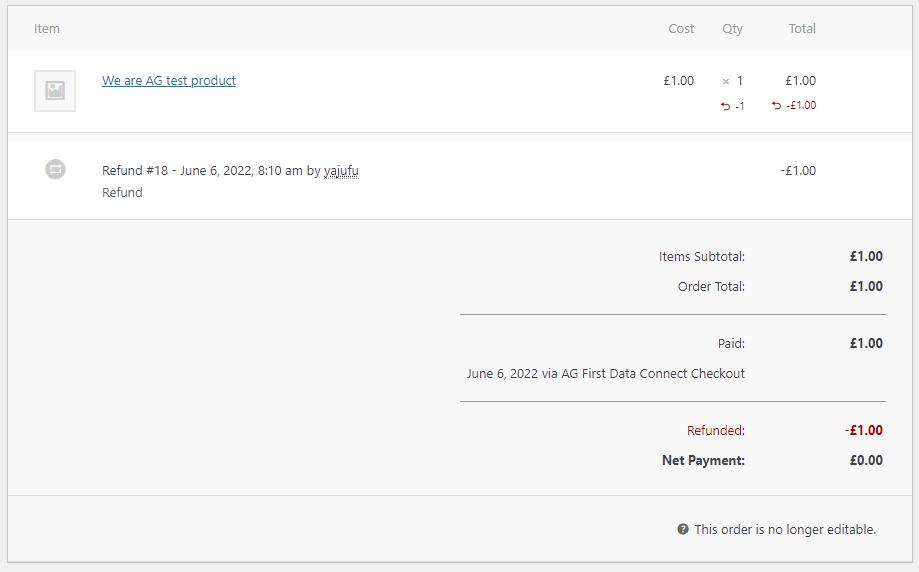
The process took seconds, as a store owner, this frees up my time to be spent elsewhere, making up for the loss! I double-checked in the Virtual Terminal for First Data (I’m anal like that) to see if it had worked:
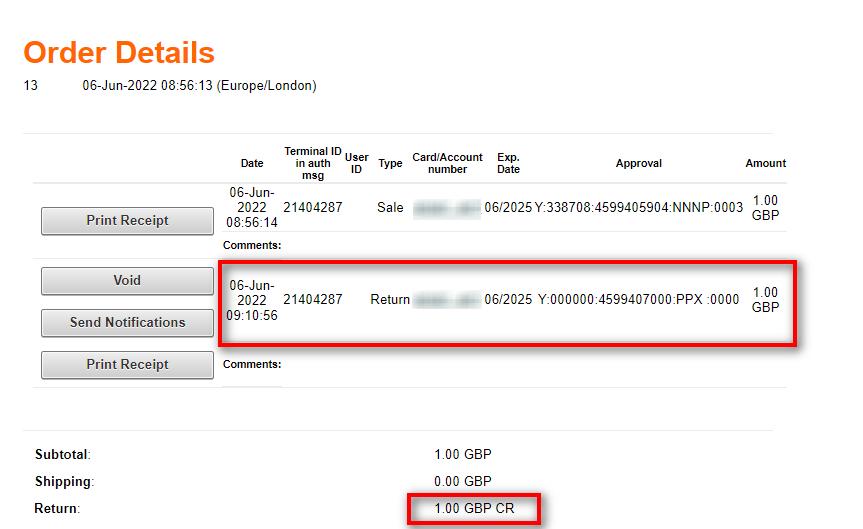
It worked, done and dusted, like I said, took mere seconds, and now we have a happy customer, because we dealt with the refund so quickly. Which is of paramount importance.
Additional menu item & documentation
Under the settings menu item in your WordPress admin sidebar, you’ll see an entry called “AG Plugins”. Again, I’m always cautious with new additions to the admin, as a lot of plugin/theme companies use them as advertising spaces.
I totally get that, but it’s my site, my space, adding loads of ads for more plugins irks me somewhat, but hey, maybe that’s just me?
So what’s inside?
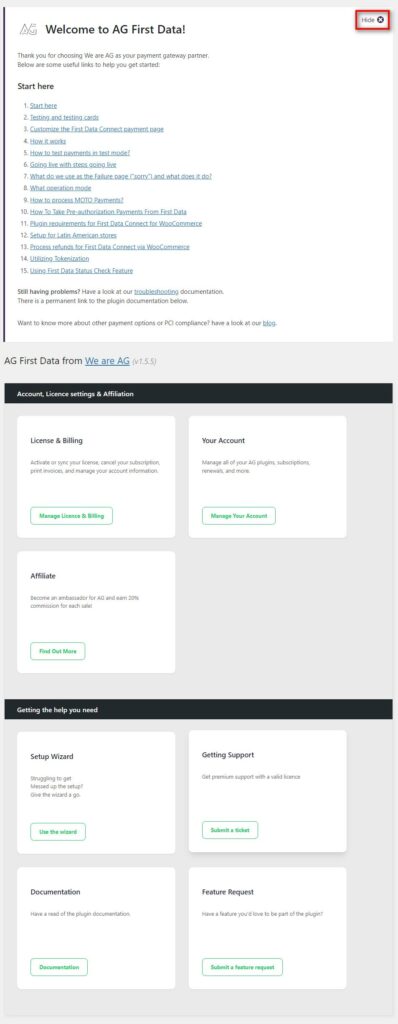
A welcome message is the first thing that hits you, along with links to documentation on how to get up and running.
A useful addition, especially if you have issues, which I doubt as it’s very simple to get up and running. That said, if you make a mistake or need help it’s but a click away.
Underneath this, a selection of boxes, with specific headers.
Such as license/billing, your account, become an affiliate, revisit the setup wizard, get support, read documentation and request features.
It’s not overly cluttered, and more importantly hasn’t been turned into an advertising space for other products by We are AG.
Documentation
This is one of those things that I often see lacking in plugins/themes, documentation is critical for users. So let’s take a quick look at how We are AG handle things.
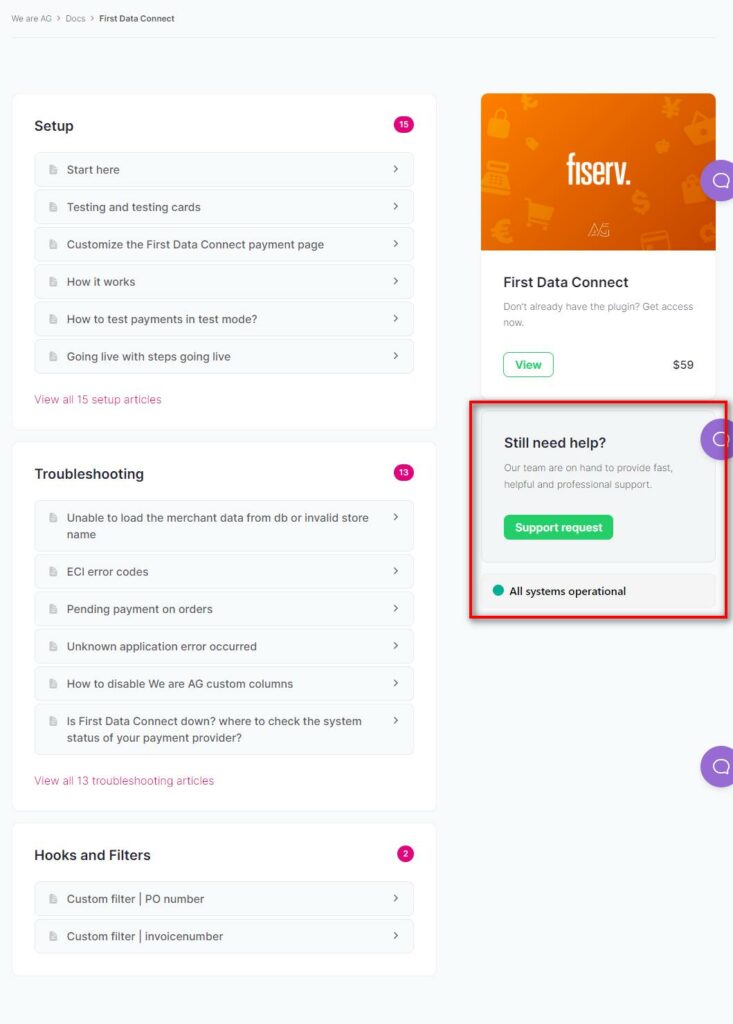
The first thing that struck me when I visited the docs’ page was the structure. As a user, I don’t want to scamper around trying to find what I need in some kind of labyrinth of links.
What you can’t see in the screenshot is a search box, this box will search only the docs for this specific plugin.
The layout is perfect for me as a store owner, I can view the setup articles, troubleshooting articles and if I was a developer, view hooks and filters documentation.
Obviously I’m no developer, but the information is there if you are. Require specific help, in the sidebar is a box for you to request support.
I like this layout, everything is there for me to read through, it’s almost like a hub I suppose, but geared towards the plugin I’m actually using.
Verdict
Truth be told, I looked for faults, I did as much as I could, but I failed. I couldn’t really find anything inherently wrong with the plugin. It does exactly what it says on the tin.
The only thing I thought (personally) was a bit lackluster, was the design options for the gateway, but this is down to First Data Connect, and not the plugin itself.
Documentation is excellent, very clean and clear. The whole process was incredibly simple from the plugin side of things, I never felt lost throughout the installation.
If you’re thinking of using First Data Connect for your online store, then (and I don’t say this that often) I’d 100% recommend using the First Data Connect For WooCommerce.
Updates from the developer
As with my other review of late, this is a new section. I’ve opened up the review for the developer to email me with any new updates for the plugin, as and when that happens, they will be listed below.
Subscribe To My Newsletter
Read it? Share it!
Leave a Reply