
How To Add Google Analytics To GeneratePress
A quick tutorial on adding Google Analytics to the GeneratePress theme. (Bonus, you don’t need yet another plugin)
You’ve got to love GeneratePress, either the free version or may fav the pro one it’s just so darn versatile.
I’m going to show you how to add Google Analytics to the GeneratePress theme. It will take you roughly around 2 minutes, thanks to how easy GeneratePress is to use!
On to the GeneratePress tutorial itself
Head on over to the Appearance menu in your WordPress admin sidebar
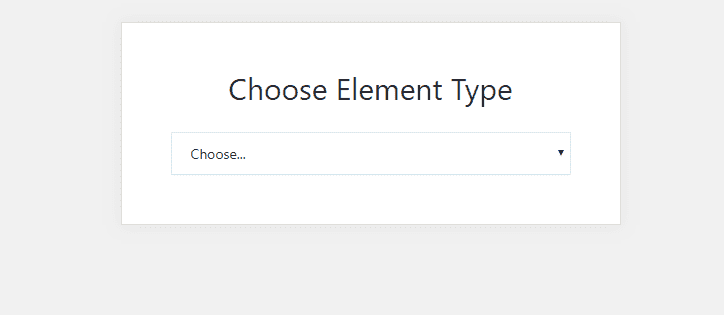
Head on over to Appearance > Elements. Click on Elements. Once you have clicked Elements you will be greeted with the above screen:
From this section, we need to choose from a dropdown list – Hook.
Select Hook from the choose Element type, Hook nothing else ok?
Adding a new Hook (this is where your Google Analytics snippet will live)
Give your new Hook a name, for tutorial purposes and perhaps your sanity; you might want to call it Google Analytics. Handy if you need to refer back to it later from the archive of Elements.
Head on over to your Google Analytics panel
I’m assuming you know how to get your GA code from the admin panel? Well if you’ve set it up correctly, you need to get your code snippet.
Click on Admin at the bottom left corner of your Analytics admin (the gear icon) if you’ve added a site, choose which one is applicable from the first column called: Account.
From here wait for the second column to refresh with the appropriate details, 3rd option down is: Tracking info. Click on this, then choose Tracking code.
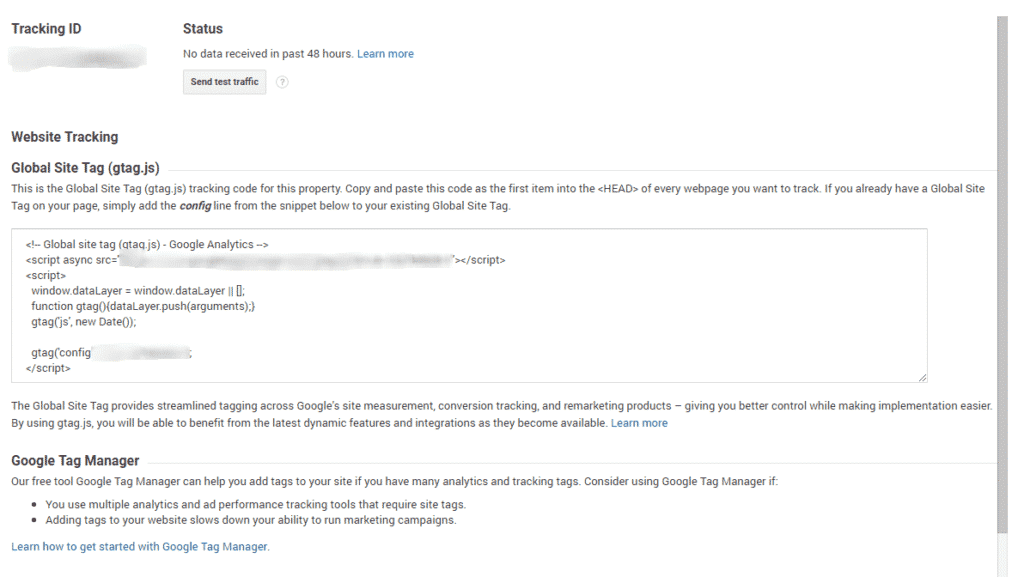
You will then see the image above. Just highlight the script we’re going to need to copy and paste. Next.
Head back to your newly created Google Analytics hook
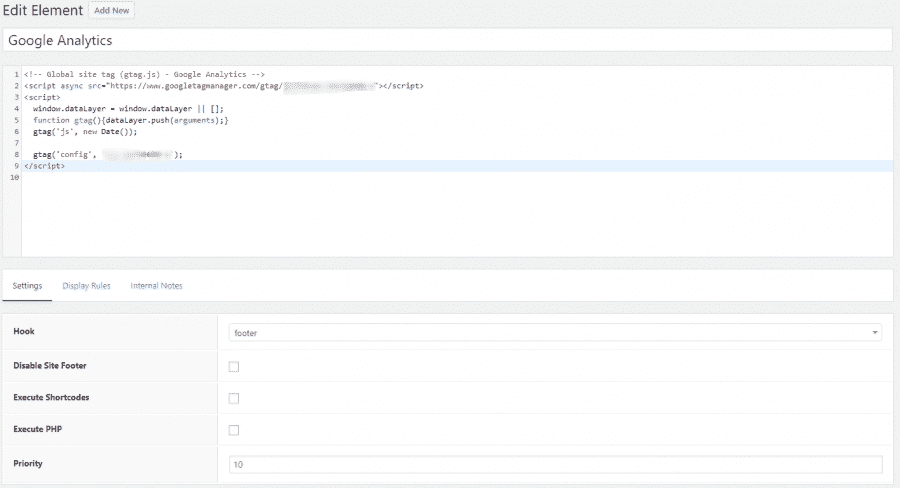
Just paste your Google Analytics script into the box directly underneath the title as above. Told you it was easy, didn’t I? No plugin needed, no tinkering around with code, etc.?
That’s the beauty of GeneratePress. We’re not done yet though, just a couple of little things.
Choose the storage location of the GA code and ensure it’s sitewide
Ok, so we’ve added our Analytics code (copy and pasted) now we need to decide where to display it. In the first option entitled Hook, you can choose a load of different options. You’re only really going to need a couple.
The next tab which says Display Rules, click on this. You will then have an option for Location; it’s here you need to choose from the dropdown “Entire Site.”
Hit publish.
Checking Google Analytics works in GeneratePress!
The last and most important step! Making sure the above works. Easy to do. After hitting publish and if you’re using a caching plugin, clear that. Then open up your website in a new window.
Head on over to your admin panel for GA, and make sure you have the right property loaded. Then in the sidebar, click on Real Time, then Overview.
You should see your visit on your site.
Hope you enjoyed this quick tutorial! If you liked this quick tutorial and would like to leave a comment about it, please do. It’s your feedback that will help me improve over time.
Subscribe To My Newsletter
Read it? Share it!
Leave a Reply